
Erde hard-top loadbars allow you to secure extra items to the top of your trailers hard-top cover. If you have completely filled you trailer and it is still under its recommended gross weight, you can secure additional items such as extra goods, cycle rails and top-boxes to the top of it with a set of hard-top loadbars.
Hard-top loadbars are available for any model of Erde trailer that is compatable with a hard-top cover.
Good features of a set of Erde loadbars include:
- Increases the capacity of your trailer (as long as it remains under recommended gross weight)
- Can be fitted to a hardtop to further increase in capacity
- Allows you to securely carry items that are slightly longer than your trailer
- The perfect base to fit cycle rails and top boxes
Bad features of Erde loadbars include:
- They are expensive
- Hardtop covers are not available for all models of trailer, so neither are hardtop loadbars
- There are no pre-drilled fittings for loadbars, you have to drill holes in your hard-top cover
Hardtop loadbars are not available for Erde 102 and Erde 213 trailers.
For a wide selection of trailer parts including Erde trailer loadbars, please visit our website: 
Back to Top |
Comments Off on Erde hard-top trailer loadbars
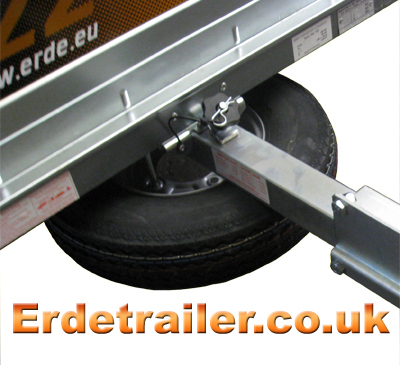
After choosing the correct spare wheel you can mount it to your trailer with a spare wheel support.
There are several different types of spare wheel supports available from Erde. The first is the SP150, which will fit Erde’s ‘leisure’ range and similar size Daxara trailers. This is an under-mounted support that suspends the spare wheel from the trailers straight drawbar. This is particularly useful on the ‘leisure’ range as it saves space and keeps the spare wheel out of the way.
The second type is the SP153. This will fit any Erde trailer that uses the old style decal. This will not fit trailers with the newer colour scheme because it is a panel mounted bracket, and the panels are now a different shape.
The third type is the SP158. A panel mounted bracket, similar to the last. This bracket will fit any Erde trailer that uses the new style decal as it suits the new shaped panels.
The final type is the SP238. This is designed for the larger commercial trailer range, and mounts the spare wheel onto one of the trailers body panels. Trailers in the ‘commercial’ range use larger, heavier wheels due to their increased size and capacity. Due to the heavier wheels, this is a heavy duty bracket.
Good features of a spare wheel support include:
- You have a spare wheel in case of emergency
- The wheel support stores the spare wheel out of the way
Bad features of a spare wheel support include:
- Adds weight to your trailer
- Removing the wheel from the support will cause the support to become loose on the drawbar. You must remember to completely remove the support or it is likely to drop off
Most spare wheel supports are very similar and will fit more than one type of trailer. Maypole manufactures a similar support to the one suitable for Erde’s ‘leisure’ range. This will also fit smaller Daxara trailers.
To purchase trailer parts and accessories including wheel supports, please visit our website:

Back to Top |
Comments Off on Erde trailer spare wheels and supports
Assembly instructions for an Erde 143 trailer kit
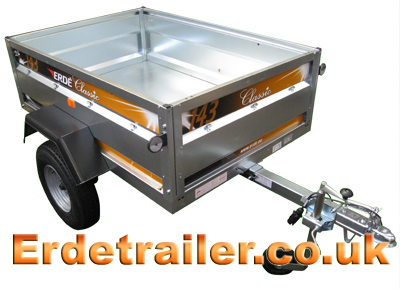
We find that some people have problems following the instructions Erde supply with their trailers. To make this easier we have put together our own illustrated instructions for assembling Erde trailers.
Tools needed:
10mm spanner/socket.
13mm spanner/socket.
17mm spanner/socket.
Flat-head screwdriver.
Socket extension.
Large punch.
Hammer.
Things to remember:
Do not fully tighten any bolts until all side panels and mudguards are correctly fitted. This is because you may need the extra slack in order to correctly position some parts.
Most nuts are captive nuts to speed up assembly.
Click on a number to quickly jump to a step.
1. Start with the floor pan upside down, fit the side reinforcement bars and axle.
2. Fit the drawbar to the axle.
3. Attach the drawbar to the floor pan using the tipping bracket.
4. Fasten the light bar to the floor pan.
5. Attach the cables to the lights.
6. Fit the wheels.
7. Thumb tighten all bolts under the trailer.
8. Turn the trailer the correct way up.
9. Fit a side panel.
10. Fit the front panel.
11. Fit the other side panel.
12. Fit the tailgate.
13. Fit the mudguards.
14. Tighten all Bolts.
15. Attach reflectors.
Please note: Due to vibration bolts can rattle loose, all bolts MUST be checked after 60 miles.
It is also recommended to check lights, couplings, wheels, and wheel bearings BEFORE every long journey.
1. Start with the floor pan upside down. Fit the side reinforcement bars and axle.
Before you can mount the axle there are reinforcement bars that must be pushed into each side of the floor pan.
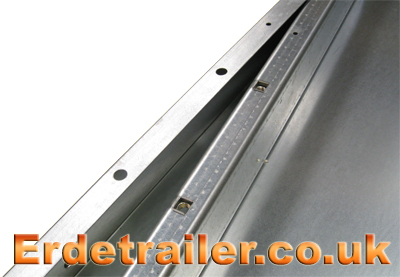
These bars also house the captive nuts used to fix the axle to the floor pan.

Now you can fit the axle to the floor pan. Do not completely tighten the axle bolts at this stage as you will need some extra slack to fit the body panels and mud guards.
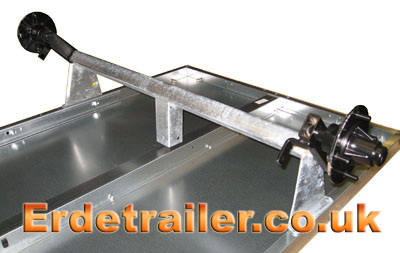
2. Fit the drawbar to the axle.
Remove the large bolt from the end of the drawbar. Thread the two colored wires through the drawbar before slotting the drawbar into the centre support of the axle. The large bolt from the drawbar passes through both parts and is secured with a lock nut. You will need a 17mm spanner and socket to tighten this.
Remember this is the pivot point for the trailers tipping feature, so don’t over tighten it.
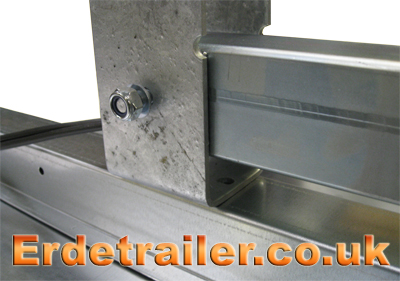
3. Attach the drawbar to the floor pan using the tipping bracket.
The tipping bracket must be fitted to the underside of the floor pan as shown below. At the centre point of the front edge are pre-drilled holes where it mounts. A 17mm socket/spanner is required for this.
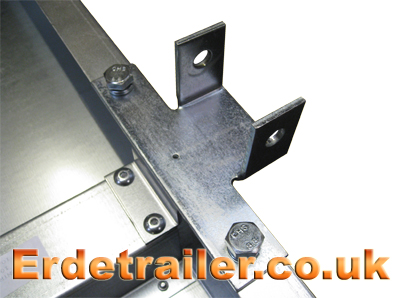
A pin through the tipping bracket holds the floor pan and drawbar together. This is secured with a split pin.
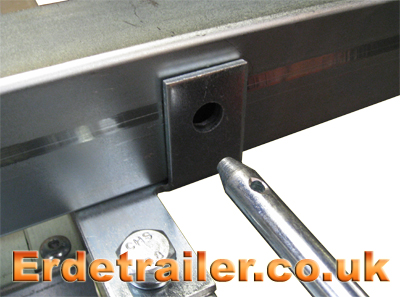
4. Fasten the rear light bar to the floor pan.
It helps to fit the rear light bar at an angle and then straiten it up when you get it into the correct position. Insert the two brass bolts secure the light bar, one on each side. It is important that these bolts are left thumb tight for now as you will need the extra slack to position the side panels.
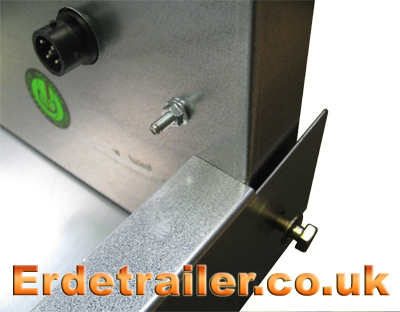
5. Attach the cables to the lights.
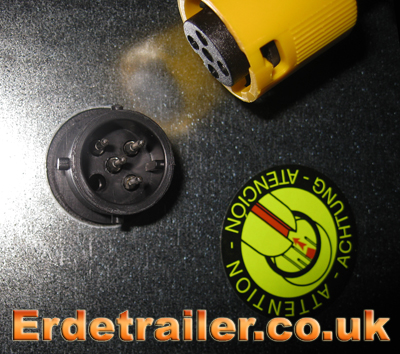
Attach the colour coded cables to the corresponding sockets on the reverse of the rear light bar. Slot the cables into the sockets and then twist the coloured sheath clockwise to lock it in place. The cable will only slot into the socket in one direction, so line up the pins and don’t force it.
6. Fit the wheels.
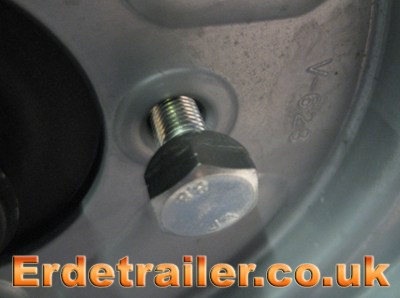
On this model of trailer the wheel nuts are actually stud bolts. To tighten these bolts evenly, work your way around the wheel tightening opposite bolts until you arrive at the first bolt again.
7. Thumb tighten all bolts under the trailer.
8. Turn the trailer the correct way up. This will require two people.
9. Fit a side panel.
It is best to mount side panels at the back first, and then lower the front into position. The easiest way of doing this is to locate the small stud on the rear of the side panel. There is a small hole on both sides of the light bar, one for each panel. Hook this stud into the hole before lowering the side panel into position.
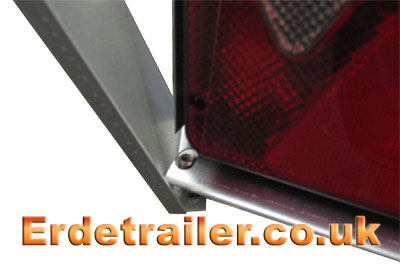
While the rear of the side panel is ‘hooked’, lower the front of the panel into position.
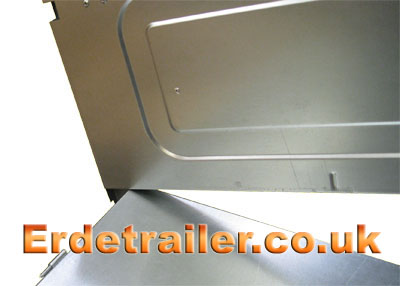
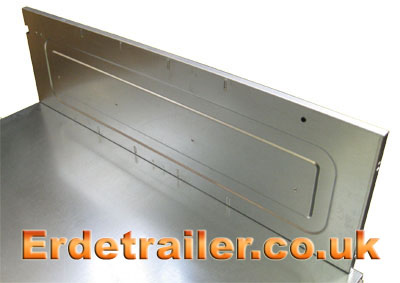
A 13mm bolt at the front and rear of the side panel will hold it in place. A smaller 10mm bolt must also be fitted underneath the rear edge where the side panel hooks into the light bar.

10. Fit the front panel.
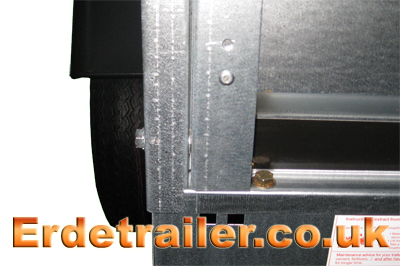
Slot the front panel into place, do not bolt it down completely at this stage.
11. Fit the other side panel in the same way as before.
12. Fit the tailgate.
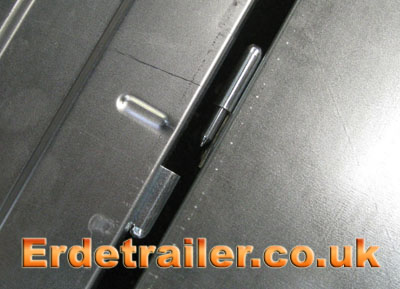
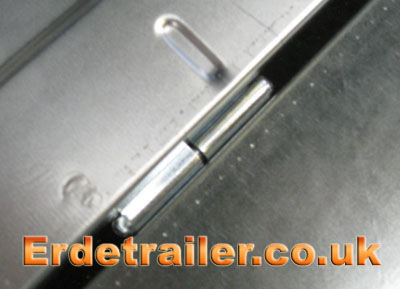
The tailgate hinge simply slides together.
13. Fit the mudguards.
Remember to fit the mudguard reinforcement plates. These prevent bolt heads from pulling through the thin metal of the mudguards.
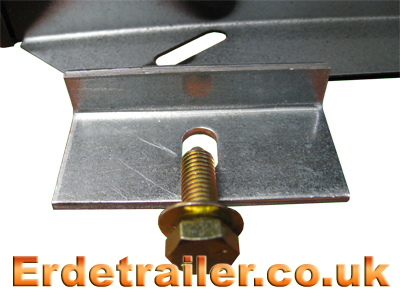
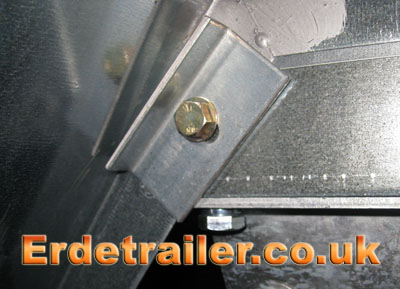
The mudguards mount onto pre-drilled holes in the side of the floor pan, located just above the wheels. On this model of trailer an extra bolt is fitted from the inside of the trailer, through the side panel and into a captive nut on the inside of the mud guard. A 13mm socket and extension is needed to reach these bolts.
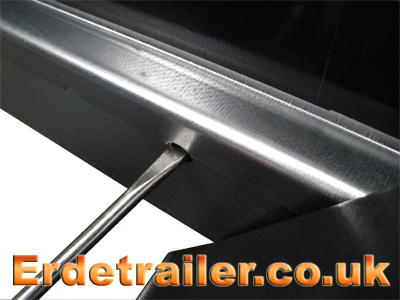
If you are having trouble with nuts and bolts not lining up, try using a screwdriver in the bolt hole to lever the panels into position. This is why most bolts should be left thumb tight until this stage.
14. Tighten all Bolts.
Start with the body panels and mud guards. Make sure all bolts are tight and these parts are secure.
To reach the axle, tipping bracket and drawbar bolts the trailer must be stood on end. Don’t worry about breaking the rear lights, they are recessed so the trailer can be stored this way.
To lift the trailer into this position it will require two people.
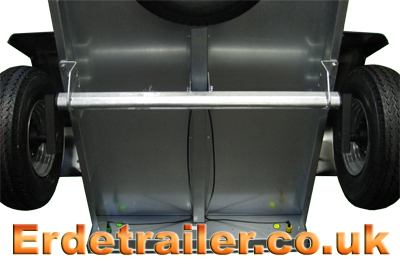
Tighten the axle bolts with a 17mm socket. You may also need a socket extension to reach past the wheels.
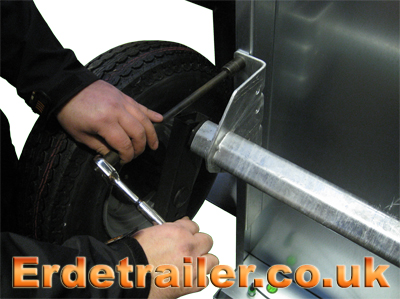
Tighten the drawbar bolt. This requires a 17mm socket and ring spanner.
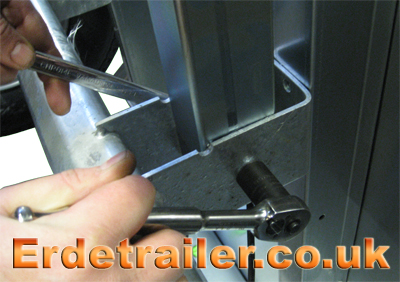
Make sure the tipping bracket is secure. If you have fitted a spare wheel holder you may not be able to use a ratchet in this small space. A 17mm ring spanner will work fine.
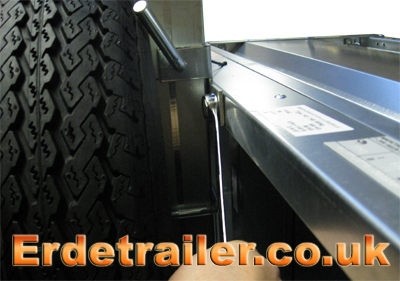
15. Attach reflectors.
The Erde 143 has large reflectors on stalks rather than small ones with peel-off sticky back adhesive. These are mounted on both front corners of the trailer into pre-drilled holes.

To attach the reflectors you will need a large punch and a hammer. Place the small plastic studs into the reflector and position the reflector in the correct place. With one firm punch, drive the plastic studs into the holes provided.
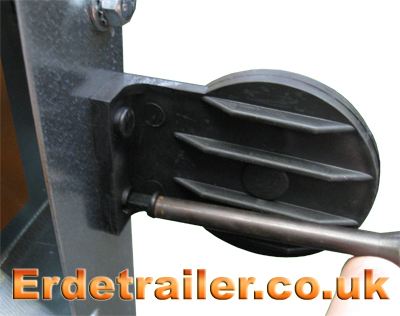
Again, remember to perform a thorough check of all nuts, bolts, wheels, bearings and lights after the first 60 miles. Vibrations can cause slackening of nuts and bolts in new trailers, so it is very important you perform this check.

To purchase Erde trailers and accessories please visit our main website:

Back to Top |
Comments Off on Assembly instructions for an Erde 143 trailer
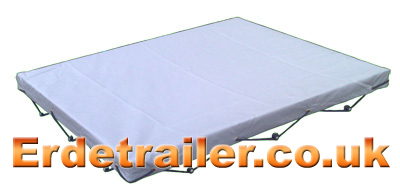
Flat-top Erde trailer covers are a popular accessory as they are less expensive and easier to fit than a hardtop cover. These flat-top covers are made from a thick waterproof material that is tailored to fit any trailer from the Erde ‘leisure’ or ‘commercial’ range.
Covers like this come complete with built in bungee cables that stretch over studs on the outside of your trailer. These bungee cables keep the cover firmly attached to the trailer, but unfortunately there is no way to lock this style of cover. Overall, this is an easy to use and versatile cover that can stop the weather from getting into your trailer.
Good features of an Erde flat-top include:
- Made of thick waterproof material
- Built in bungee cord
- Cheaper than a hardtop
- Easily removed if required
Bad features of an Erde flat top:
- Can not be locked
- Can be torn or cut
- During heavy rain the cover can sag and collect water
- Cannot be fitted to a trailer with a ladder rack
Flat-top covers are available for all models of trailer in the Erde ‘leisure’ or ‘commercial’ range.
For a wide selection of towing and trailer related products, including trailer covers, please visit our website:

There is a selection of security devices available for Erde trailers, ranging from coupling head locks to wheel clamps. Trailer theft is a common problem, especially with commercial trailers as they can be worth a lot of money.
You can protect your Erde trailer with any of the following:
Hitch locks
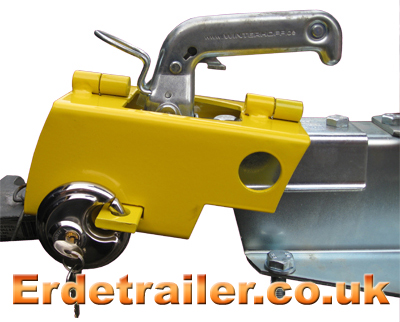
Hitch locks fit over the trailers towing hitch and then padlock shut, completely preventing the towing hitch from operating. Fitting the hitch lock while the trailer is connected to a car will prevent anybody from uncoupling the trailer.
This type of hitch lock is manufactured by Mottez, and is one of the few hitch locks that will fit all models of Erde trailer. This is due to the rear of the lock having a ‘cut out’ that avoids obstructions such as a-frame drawbars.
Coupling head locks
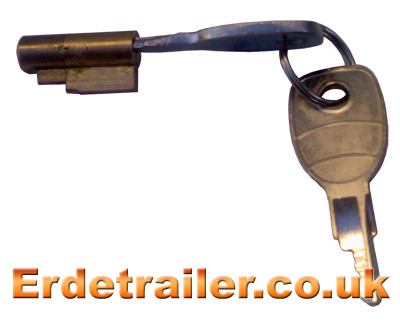
Coupling head locks are small metal locks that push into a hole on the coupling head. Turn and remove the key to lock the internal mechanism of the coupling. This too can be used while the trailer is hitched to prevent anybody uncoupling the trailer.
Wheel clamps

Wheel clamps are also a popular choice in trailer security. You cannot tow a clamped trailer without causing serious damage to it or attracting a lot of attention, making this security device extremely efficient.
‘Trailer Cop’ locks
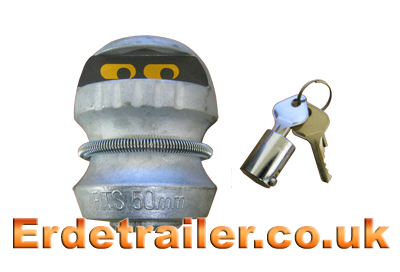
‘Trailer Cop’ locks are tow ball shaped and fit into the towing hitch of your trailer. To lock them, use a key to open the bottom of the lock and reveal a bolt inside. Tightening this bolt with an Allen Key forces the lock to expand inside the towing hitch which holds it in place. Use the key again to return the bottom of the lock, protecting the expander bolt inside.
Once locked in they are difficult to remove and render the towing hitch of your trailer useless. Unfortunately they do not protect any other parts of your towing hitch, such as the bolts that connect the hitch to the trailer. So while this lock sounds like a good idea, in reality it is not as effective as others.
For extra security you could always fit more that one of these devices at once. Clamping a wheel and locking the coupling at the same time would completely incapacitate a trailer.
For a wide range of security devices please visit our website:

Back to Top |
Comments Off on Erde trailer security devices
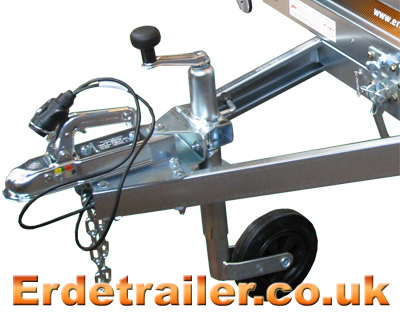
All Erde trailers can be equipped with a jockey wheel. Installing a jockey wheel on your trailer will mean that you will no longer have to bend down and lift the coupling as far to get it onto the tow ball. A jockey wheel will also make moving an un-hitched trailer by hand much easier, and it will keep your trailer level so it can be loaded while un-hitched.
Erde supply two types of jockey wheels, a lightweight version for smaller trailers and a heavy version for the commercial range. The commercial jockey wheel has a heavy duty bracket that is designed to support the weight of larger commercial trailers with A-frame draw bars. Unlike the lightweight version, this bracket mounts on the inside of the A-frame drawbar just behind the coupling.
The heavy duty bracket and bigger wheel make this a much stronger alternative to the lightweight jockey wheel.
Good features of a jockey wheel include:
- Makes your trailer more manageable when moving it by hand
- You no longer have to bend down and lift the coupling as far to hitch it
- Keeps your trailer horizontal when in storage
Bad features of a jockey wheel include:
- They can be expensive, especially heavy duty models
- Some people forget about jockey wheels and don’t wind them in before driving off, wearing out an expensive wheel in minuets
For a lighter jockey wheel more suitable for Erde’s leisure range, please click here.
For a wide selection of trailer parts including trailer jockey wheels, please visit our website:

Back to Top |
Comments Off on Erde commercial jockey wheels
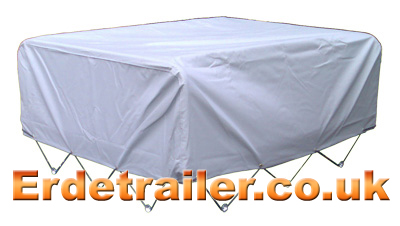
Erde 30cm high waterproof trailer covers are a popular accessory as they are less expensive and easier to fit than a hardtop cover. These high covers are made from a thick waterproof material that is tailored to fit any trailer from the Erde ‘leisure’ or ‘commercial’ range.
Covers like this come complete with a metal frame to support them, which also increases the capacity of your trailer by a further 30cm in height. This cover also has built in bungee cables that stretch over hooks on the outside of your trailer. These bungee cables keep the cover firmly attached to the trailer, but unfortunately there is no way to lock this style of cover. Overall, this is an easy to use and versatile cover that can stop the weather from getting into your trailer.
Good features of an Erde 30cm high cover include:
- Made of thick waterproof material
- Extends the capacity of your trailer
- Built in bungee cord
- Cheaper than a hardtop
- Easily removed if required
Bad features of an Erde flat top:
- Can not be locked
- Can be easily torn or cut
- During heavy rain the cover can sag and collect water
- Cannot be fitted to a trailer with a ladder rack
30cm High waterproof covers are available for all models of trailer in the Erde ‘leisure’ or ‘commercial’ range.
For a wide selection of towing and trailer related products including trailer covers, please visit our website:

Back to Top |
Comments Off on Erde 30cm high waterproof cover with metal frame
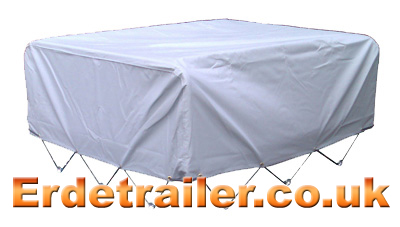
Erde 60cm high waterproof trailer covers are a popular accessory as they are less expensive and easier to fit than a hardtop cover. These high covers are made from a thick waterproof material that is tailored to fit any trailer from the Erde ‘leisure’ or ‘commercial’ range.
Covers like this come complete with a metal frame to support them, which also increases the capacity of your trailer by a further 60cm in height. This cover also has built in bungee cables that stretch over studs on the outside of your trailer. These bungee cables keep the cover firmly attached to the trailer, but unfortunately there is no way to lock this style of cover. Overall, this is an easy to use and versatile cover that can stop the weather from getting into your trailer.
Good features of an Erde 60cm high cover include:
- Made of thick waterproof material
- Extends the capacity of your trailer
- Built in bungee cord
- Cheaper than a hardtop
- Easily removed if required
Bad features of an Erde flat top:
- Can not be locked
- Can be easily torn or cut
- During heavy rain the cover can sag and collect water
- Are not available for all models of trailer
- Cannot be fitted to a trailer with a ladder rack
60cm High waterproof covers are available for trailer models 143 and above.
For a wide selection of towing and trailer related products including trailer covers, please visit our website:

Back to Top |
Comments Off on Erde 60cm high waterproof cover with metal frame
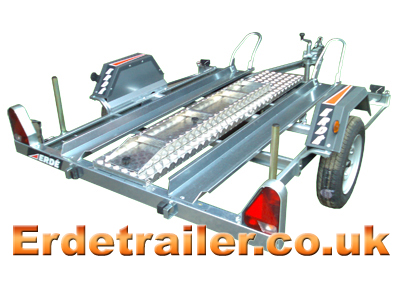
The Erde CH751 is the largest trailer in Erde’s motorcycle range. The CH751 can carry three motorcycles with a combined weight of up to 625kg. This trailer can also be fitted with quad bike running boards.
| External Dimensions |
| Overall Length |
3m |
9’10” |
| Overall Width |
1.86m |
6’1” |
| Overall Height |
0.70m |
2’3” |
| Weights |
| Gross trailer weight |
750kg |
1653lb |
| Unladen weight |
125kg |
275lb |
| Carrying capacity |
625kg |
1377lbs |
| Other Details |
| Number of motorcycles |
3 motorcycles or 1 quad bike |
Wheel and tyres |
145R13 Tyres with 130mm PCD rims |
| Suspension type |
Full track rubber torsion independent axle |
| Coupling type |
Unbraked 50mm pressed coupling |
To purchase an Erde CH751 trailer click here.
To purchase accessories for an Erde CH751 trailer click here.
Back to Top |
Comments Off on Erde CH751 motorcycle trailer specification
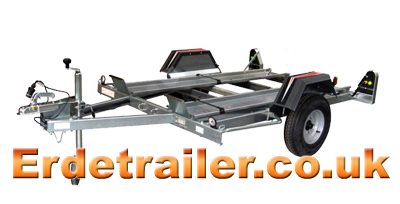
The Erde CH451 motorcycle trailer is a mid-range motorcycle trailer. It has a reinforced design allowing it to carry two motorcycles with a combined weight of up to 344kg. This trailer can also be fitted with running boards that support a quad bike.
| External Dimensions |
| Overall Length |
3m |
9’10” |
| Overall Width |
1.60m |
5’2” |
| Overall Height |
0.70m |
2’3” |
| Weights |
| Gross trailer weight |
450kg |
992lb |
| Unladen weight |
106kg |
233lb |
| Carrying capacity |
344kg |
758lbs |
| Other Details |
| Number of motorcycles |
2 motorcycles or 1 quad bike |
| Wheel and tyres |
5.00/10 Tyres with 115mm PCD rims |
| Suspension type |
Full track rubber torsion independent axle |
| Coupling type |
Unbraked 50mm pressed coupling |
To purchase an Erde CH451 trailer click here.
To purchase accessories for an Erde CH451 trailer click here.
Back to Top |
Comments Off on Erde CH451 motorcycle trailer specification
![]()


