Erde Torque settings.
Erde Instructions now include Torque settings but for those that have lost them or people with older trailers that did not include torque settings please see the list below.
Erde trailer wheel torque settings
Torque setting for Small cast aluminium hubs 60 N/m or 45 lb/ft used on.
Erde 102.
Erde 122.
Erde 132.
Erde PM310 Motorcycle trailer.
These require 17mm socket
Torque setting for cast steel hubs M10 x 1.5 70 N/m or 52 lb/ft used on.
Erde 142.
Erde 143.
Erde CH451 Motorcycle trailer.
These require 17mm socket in hubs with nuts (RTN) and 19mm on hubs with studbolts (Alko) newer models
Torque setting for cast steel hubs (13″ wheels) 120 N/m or 89 lb/ft used on.
Erde 153.
Erde 163.
Erde 193.
Erde 213.
Erde 233.
Erde 234.
Erde CH751 Motorcycle trailer
General Erde trailer torque settings
Torque setting for M6 bolts (10mm head) 8 N/m or 6 lb/ft used on.
Screws on the bottom courners of the light bar.
Torque setting for M8 bolts (13mm head) 18 N/m or 13 lb/ft used on.
Body panels (all models).
Cycle Deflectors / Nudge bars on commercial trailes only (153 and above).
Mudguards on all models.
Tipping bracket on all models excluding 142 and 143.
Torque setting for M10 bolts (17mm head) 36 N/m or 27 lb/ft used on.
Axles on Leisure trailers (upto 143).
Couplings on all models.
Drawbar on Leisure trailers (upto 143).
Tipping bracket on newer 142 and 143 trailerson all models.
Torque setting for M12 bolts (19mm head) 60 N/m or 45 lb/ft used on.
Axles and drawbars on all commercial trailers (13″ wheels) 153 and above.
Related products from Towing And Trailers Ltd.
Erde Trailers.
Erde accessories.
Erde Spare parts.
Back to Top |
Comments Off on Torque settings for Erde trailers and wheels
Tags:
Assembly instructions for an Erde 234x4F trailer kit
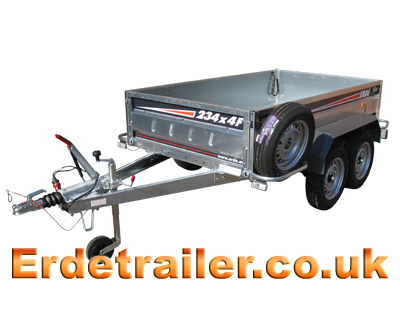
We find that some people have problems following the instructions Erde supply with their trailers. To make this easier we have put together our own illustrated instructions for assembling Erde trailers.
Tools needed:
10mm spanner/socket.
13mm spanner/socket.
17mm spanner/socket.
Flat-head screwdriver.
Socket extension.
Things to remember:
Do not fully tighten any body panel bolts until all side panels and mudguards are correctly fitted. This is because you may need the extra slack in order to correctly position some parts.
Most nuts are captive nuts to speed up assembly.
Click on a number to quickly jump to a step.
1. Start with the floor pan upside down. Fit the side reinforcement bars and axles.
2. Attach the brake cables.
3. Attach the drawbar to the front axle.
4. Fix the drawbar to the floor pan.
5. Fasten the light bar to the floor pan.
6. Attach the cables to the lights.
7. Fit the wheels.
8. Tighten all bolts underneath the trailer.
9. Turn the trailer the correct way up.
10. Fit a side panel.
11. Fit the other side panel.
12. Fit the front panel.
13. Fit the rear nudge bars and tailgate.
14. Fit the mudguards.
15. Fit the front ‘nudge’ bars.
16. Mount the braked coupling and set up the brakes.
17. Tighten all Bolts.
Please note: Due to vibration bolts can rattle loose, all bolts MUST be checked after 60 miles.
It is also recommended to check lights, couplings, wheels, and wheel bearings BEFORE every long journey.
1. Start with the floor pan upside down. Fit the side reinforcement bars and axles.
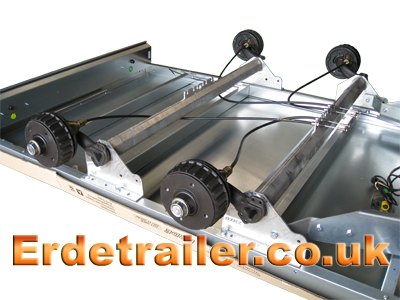
Before you can mount the axles you must check that the reinforcement bars are in place. These should already be in position, if not, they must be pushed into each side of the floor pan where the captive nuts in the reinforcement bars will line up with the bolt holes in the floor pan. These captive nuts will be used to fix the axles to the floor pan.
Now you can fix the axles to the floor pan. Each axle will have four bolts holding it to the floor pan, two with captive nuts, and two with nylock nuts. Be sure to tighten all of the axle bolts fully at this stage as the trailer will be too heavy to turn back over later.
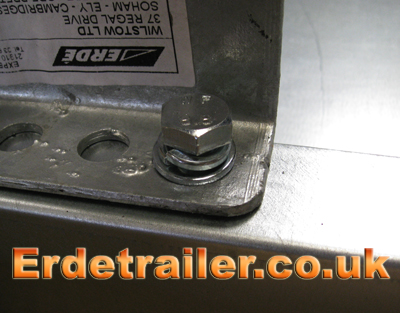
A spring washer should be used on each axle bolt to prevent them from vibrating loose.
2. Attach the brake cables.
After bolting the axles to the floor pan you can begin to set up the trailers brakes. Start by locating the end of the brake cable with a small black stud. This stud will need to be inserted into an eye inside the brake’s expander that should be visible through a small slot in the back plate of the brake. See the example below.
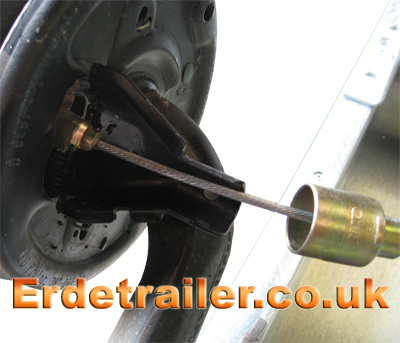
After you have this stud seated in the brake’s expander, you must keep some tension on the cable to prevent it from falling back out. Now insert the cable cover plate. See the example below.
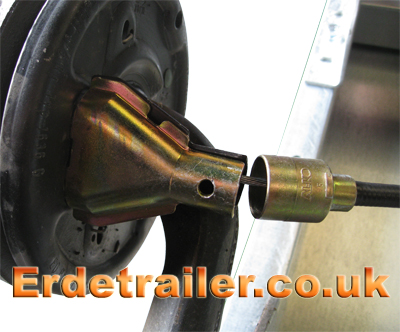
When the cover plate is in place, slide the metal connector from the end of the cable’s sheath over both the cover plate you fitted and the fixed one that was already in place. See the example below.
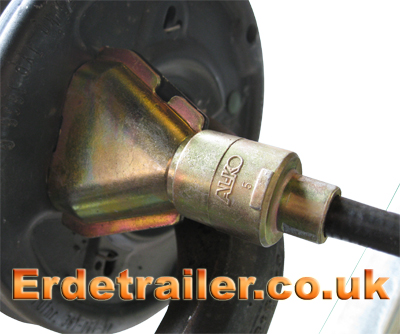
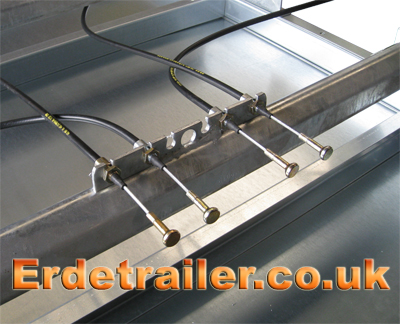
Now you can fix the other ends of the brake cables to the anchor plate of the front axle. It is possible to cross cables over to take up slack in them if you feel it is necessary, but if you do, you must make sure that the cables are evenly matched on both sides of the trailer. If you position your cables unevenly you may end up with uneven braking efficiency. The example below is the most straight forward way anchoring these cables.
3. Attach the drawbar to the front axle.
First you will need to open up the drawbar. Connect one side of the drawbar to the axle before opening it so that you have something to pull against, this should make it easier.
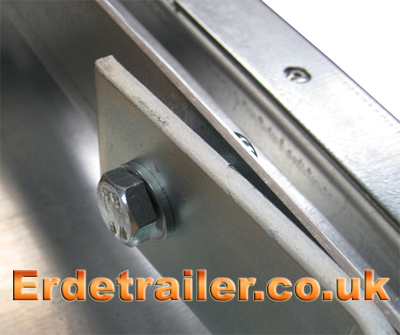
When the A-frame drawbar has been opened up, bolt the end you were pulling on to the opposite side of the axle.
Remember to thread the two coloured wires through the drawbar making sure you leave enough slack to reach the light bar.
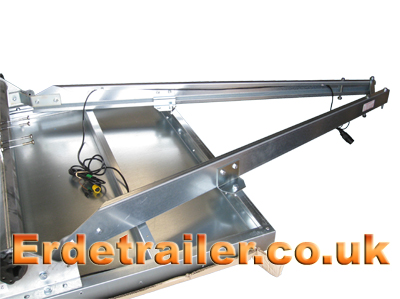
4. Fix the drawbar to the floor pan.
Using the brackets found on the drawbar you must firmly bolt the drawbar to the floor pan. There is no tipping feature on Erde’s twin axle trailers.
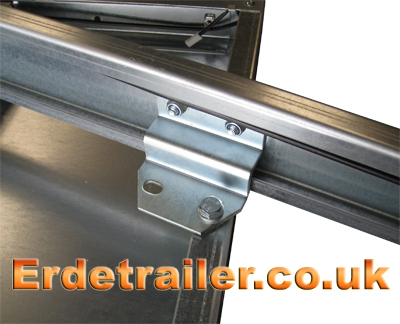
5. Fasten the rear light bar to the floor pan.
The light bar is eventually secured by the body panels, but first you must slot it under this plate. This will hold the light bar in place while you turn the trailer the correct way up to fit the body panels.
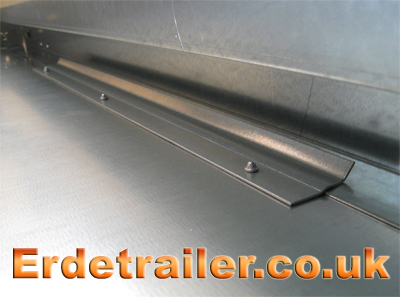
6. Attach the cables to the lights.
Attach the colour coded cables to the corresponding sockets on the reverse of the rear light bar. Slot the cables into the sockets and then twist the coloured sheath clockwise to lock them in place. The plugs will only slot into the sockets in one direction, so line up the pins and don’t force it. Once connected, rout the cables neatly along the inside of the drawbar using the clips provided.
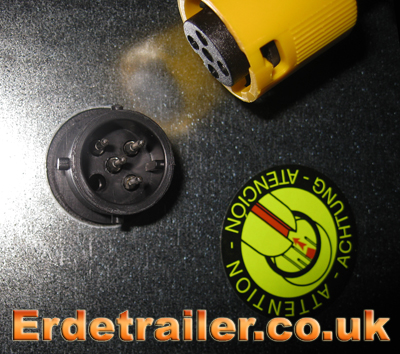
7. Fit the wheels.
This model of trailer uses wheel studs as opposed to nuts. To tighten studs evenly you should work your way around the wheel tightening opposite bolts until you arrive at the first one again. This is the best method of tightening any wheel nut or stud as it results in even tension around the rim.
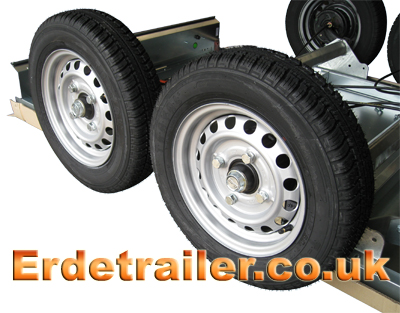
8. Tighten all bolts under the trailer.
9. Turn the trailer the correct way up. This will require at least two people.
10. Fit a side panel.
It is best to mount side panels at the back first, hooking the light bar with the rear of the panel. Now lower the front into position. When you get a side panel into the correct position insert a 13mm bolt into both ends of it and tighten them up with your fingers to hold it in place.
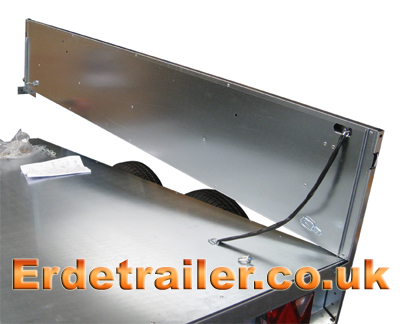
11. Fit the other side panel in the same way as before.
When both side panels are in place there are two 10mm bolts that secure the light bar to the rear end of both side panels. These bolts should be inserted underneath the two rear corners of the trailer and tightened up into captive nuts in the light bar. It is important to remember these as they are so small they often get forgotten.
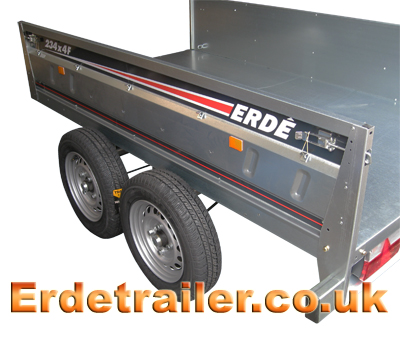
12. Fit the front panel.
The front panel on the 234×4 is hinged and removable, making this trailer more versatile.
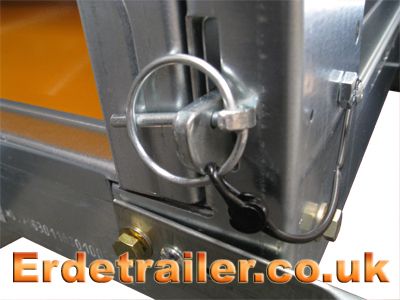
On each side of the front panel you will notice two small lugs. The lugs at the top of this panel slot into cut-outs in the front edge of both side panels. This forms a basic hinge. See the example below.
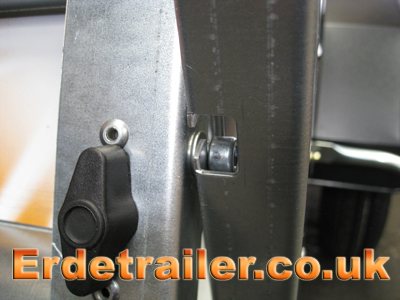
The lugs at the bottom of this panel slot into latches found at the front of each side panel. These latches can be quite stiff, so line the lugs up with the latches before firmly swinging the panel into place. These latches are then secured with lynch pins.
13. Fit the rear nudge bars and tailgate.
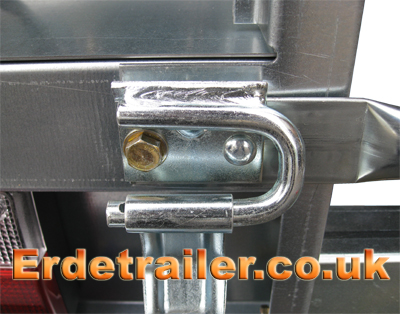
Before the tailgate can be fitted you must first attach hinges to the rear of you trailer. The tailgate hinges for this trailer are fixed to the rear nudge bars, therefore these will need fitting too.
Nudge bars are fastened to the trailer with two bolts. One bolt tightens into a captive nut on the side of the trailer, the other tightens into a captive nut in the rear of the trailer. Once the nudge bars and hinges are in place, simply slot the tailgate onto its hinges and insert an R-clip into a small hole in the right hand hinge.
14. Fit the mudguards.
The mudguards mount onto pre-drilled holes in the sides of the floor pan and side panels. You can see the captive nuts positioned along the side panels, so all you have to do is simply line the mudguards up with these and bolt them on. A 13mm socket and extension is needed to reach these bolts.
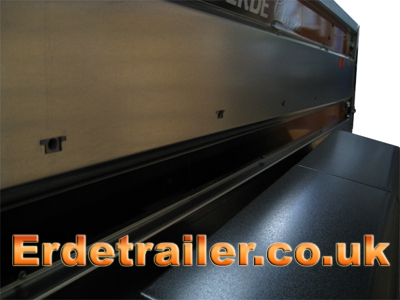
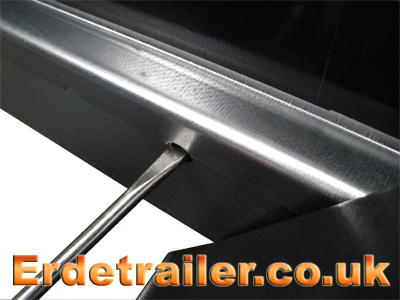
If you are having trouble with nuts and bolts not lining up, try using a screwdriver in the bolt hole to lever the panels into position. This is why bolts in the body panels should be left thumb tight until this stage.
15. Fit the front ‘nudge’ bars.
Two bolts hold each of these bars in place. One on the side…

…and one on the front.
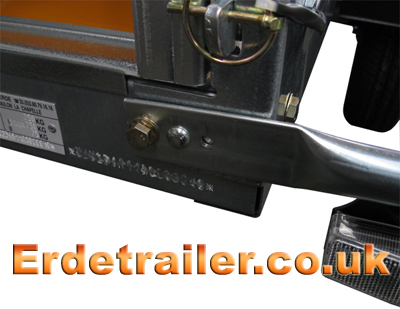
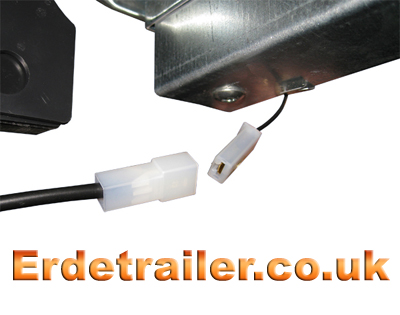
While fitting the nudge bars you will notice the front marker lights attached to them. Once the bars are in place you will need to connect the marker lights to the trailers wiring loom. Under both front corners of the trailer you will see a small electrical plug, this is where you plug them in.
16. Install the braked coupling and set up the brakes.
Now the trailer is almost complete you can mount the braked coupling to the A-frame drawbar. The coupling bolts to the drawbar with 4 large bolts, washers and nylock nuts.
As you begin to bolt the coupling to the drawbar, make sure that the bolts pass through the spacers on the inside of the drawbar. These spacers prevent you from crushing the drawbar when you tighten up the coupling bolts.
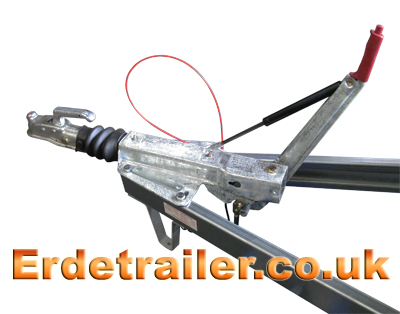
Once you have fixed the coupling to the drawbar you will need to connect it to the brake cables using a length of threaded bar. To do this you must screw one end of the threaded bar into the clevis at the base of the handbrake, while the other end is linked to the brake compensator.
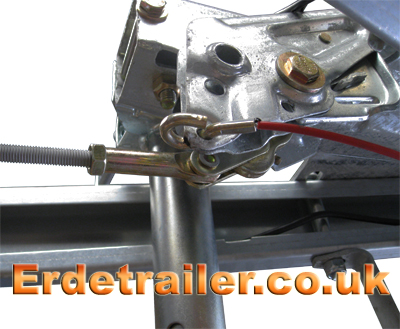
Feed the threaded bar through the compensator and connect the ‘nipple’ ends of the cables to it as well. The threaded bar is linked to the compensator by a nut with a long plastic cover. Insert this nut into the centre hole of the anchor plate and screw it onto the threaded bar by hand until it is tight against the compensator. Tightening this against the compensator should take the slack out of the brake cables.
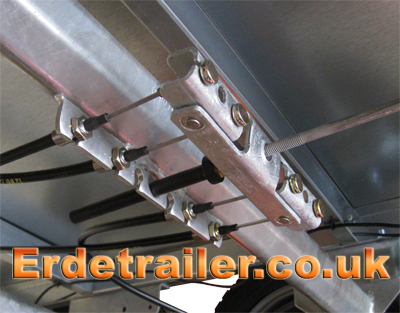
It is important to keep the compensator well adjusted as this will give you even braking pressure. If your compensator is not straight this usually means that you brakes have worn and they are ready for a service. Although, in a new trailer like this it is more likely that you have not correctly fitted you brake cables. If this is the case you should check them again.
17. Tighten all Bolts.
Start with the body panels and mud guards before double checking the axle and drawbar. Make sure all bolts are tight and special attention has been paid to the axles, drawbar and coupling.
Again, remember to perform a thorough check of all nuts, bolts, wheels, bearings and lights after the first 60 miles. Vibrations can cause slackening of nuts and bolts in new trailers, so it is very important you perform this check.

For a large selection of Erde trailers and accessories please visit our main website – towingandtrailers.co.uk

Back to Top |
Comments Off on Erde 234x4F trailer assembly instructions
Assembly instructions for an Erde 234×4 trailer kit
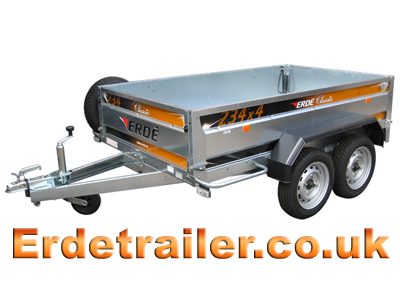
We find that some people have problems following the instructions Erde supply with their trailers. To make this easier we have put together our own illustrated instructions for assembling Erde trailers.
Tools needed:
10mm spanner/socket.
13mm spanner/socket.
17mm spanner/socket.
Flat-head screwdriver.
Socket extension.
Things to remember:
Do not fully tighten any body panel bolts until all side panels and mudguards are correctly fitted. This is because you may need the extra slack in order to correctly position some parts later.
Most nuts are captive nuts to speed up assembly.
Click on a number to quickly jump to a step.
1. Start with the floor pan upside down, fit the side reinforcement bars and axles.
2. Reinforce the axles.
3. Attach the drawbar to the front axle.
4. Attach the drawbar to the floor pan using the tipping bracket.
5. Fasten the light bar to the floor pan.
6. Attach the cables to the lights.
7. Fit the wheels.
8. Tighten all bolts underneath the trailer.
9. Turn the trailer the correct way up.
10. Fit a side panel.
11. Fit the other side panel.
12. Fit the front panel.
13. Fit the tailgate.
14. Fit the mudguards.
15. Tighten all Bolts.
16. Attach the ‘nudge’ bars.
Please note: Due to vibration bolts can rattle loose, all bolts MUST be checked after 60 miles.
It is also recommended to check lights, couplings, wheels, and wheel bearings BEFORE every long journey.
1. Start with the floor pan upside down. Fit the side reinforcement bars and axles.
Before you can mount the axles you must check that the reinforcement bars are in place. These should already be in position, if not, they must be pushed into each side of the floor pan where the captive nuts in the reinforcement bars will line up with the bolt holes in the floor pan. These captive nuts will be used to fix the axles to the floor pan.
Now you can fix the axles to the floor pan. Be sure to tighten the axle bolts fully at this stage as the trailer will be too heavy to turn back over later.
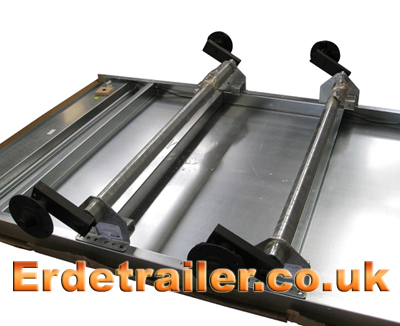
A spring washer should be used on each axle bolt to prevent them from vibrating loose.

2. Reinforce the axles.
To add strength to the axles, a reinforcing plate must be bolted between the axles on either side of the trailer. This also provides a solid place to mount the drawbar.
3.Mount the drawbar.
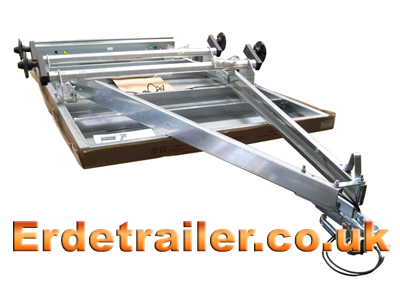
At the end of the drawbar, remove the large bolt that is only thumb tight where the coupling connects to the A-frame. This loose bolt keeps the A-frame drawbar folded together during shipping and will need removing before the drawbar can be opened up.
Remember to thread the two coloured wires through the drawbar, leaving enough slack to reach the light bar.
Now you will need to open up the drawbar. Connect one side of the drawbar to the axle before opening it so that you have something to pull against, this should make it easier.

When the A-frame drawbar has been opened up, bolt the end you were pulling on to the opposite side of the axle.
Replace the bolt that you removed from the coupling before opening up the drawbar. You will notice that this bolt now passes through both the coupling and drawbar, tighten this up to lock the A-frame in position.
4. Attach the drawbar to the floor pan using the tipping bracket.
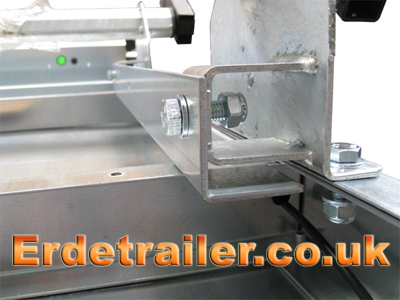
Due to the twin axle design of this trailer it does not have the tipping feature found on Erde’s smaller trailers, although it still uses the tipping bracket to firmly attach the drawbar to the floor pan.
In order to attach the tipping bracket you will first have to fit the A-frame’s reinforcing crossbar. This is a small length of box section with angled edges that fits between the two main sections of the drawbar. This gives the drawbar extra strength, as well as a place to mount a tipping bracket.
The crossbar may need some persuasion in order to get it into the correct position. A rubber mallet is perfect for this as won’t mark the metal as you tap it into place. Once the captive nuts in the crossbar line up with the bolt holes in the drawbar it is in place and can be secured with bolts and spring washers.
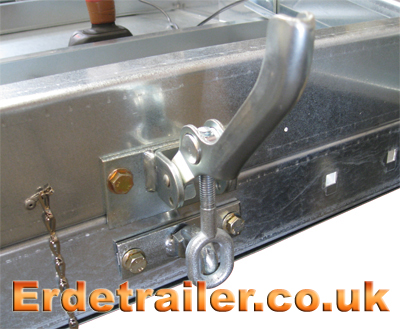
The tipping bracket must be fitted to the floor pan as shown below. There are pre-drilled holes on the front edge of the floor pan where the ‘hook’ shaped part of the bracket mounts. The adjustable latch comes pre-attached to the A-frame crossbar. Remember that in the image below the floor pan is upside down.
5. Fasten the rear light bar to the floor pan.
The light bar is eventually secured by the body panels, but first you must slot it under this plate. This will hold the light bar in place while you turn the trailer the correct way up to fit the body panels.

6. Attach the cables to the lights.
Attach the colour coded cables to the corresponding sockets on the reverse of the rear light bar. Slot the cables into the sockets and then twist the coloured sheath clockwise to lock them in place. The plugs will only slot into the sockets in one direction, so line up the pins and don’t force it. Once connected, rout the cables neatly along the inside of the drawbar using the clips provided.

7. Fit the wheels.
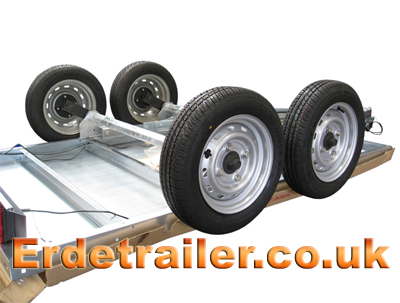
This model of trailer uses wheel studs as opposed to nuts. To tighten these studs evenly you should work your way around the wheel tightening opposite bolts until you arrive at the first one again. This is the best method of tightening any wheel nut or stud as it results in even tension around the rim.
8. Tighten all bolts under the trailer.
9. Turn the trailer the correct way up. This will require at least two people.
10. Fit a side panel.
It is best to mount side panels at the back first, hooking the light bar with the rear of the panel. Now lower the front into position. When you get a side panel into the correct position insert a 13mm bolt into both ends of it and tighten them up with your fingers to hold it in place.

11. Fit the other side panel in the same way as before.
When both side panels are in place there are two 10mm bolts that secure the light bar to the rear end of both side panels. It is important to remember these as they are so small they often get forgotten.
12. Fit the front panel.
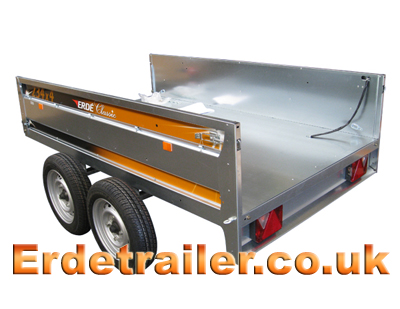
The front and rear panels on the 234×4 are hinged and removable, making the trailer more versatile. This does make them slightly trickier to fit.
On each side of the front panel you will notice two small lugs. The lugs closest to the top of this panel slot into a cut out in the front edge of both side panels. This forms a basic hinge. See the example below.

The lugs at the bottom of this panel slot into latches also at the front of each side panel. These latches can be quite stiff, so line the lugs up with the latches before firmly swinging the panel into place. These latches are then secured with lynch pins.

13. Fit the tailgate.
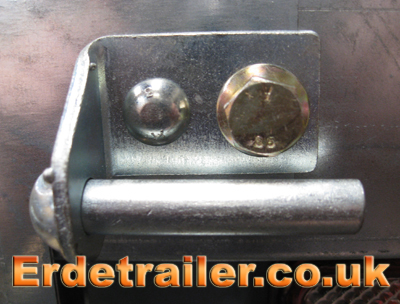
Before the tailgate can be fitted you must first attach hinges to the rear of you trailer. These hinges fasten to the trailer with a single bolt while small locating studs hold them in the correct position. Locating studs are useful when you begin to tighten the bolts securing the hinges because the hinge would naturally want to rotate with the bolt when under pressure.
14. Fit the mudguards.
The mudguards mount onto pre-drilled holes in the sides of the floor pan and side panels. You can see the captive nuts along the side panels, simply line the mudguards up with these and bolt them on. A 13mm socket and extension is needed to reach these bolts.

If you are having trouble with nuts and bolts not lining up, try using a screwdriver in the bolt hole to lever the panels into position. This is why bolts in the body panels should be left thumb tight until this stage.

15. Tighten all Bolts.
Start with the body panels and mud guards before double checking the axle, drawbar and tipping bracket. Make sure all bolts are tight and special attention has been paid to the axles and tipping bracket.
16. Fit the front ‘nudge’ bars.
Two bolts hold each of these bars in place. One on the side…

…and one on the front.

While fitting the nudge bars you will notice the front marker lights attached to them. Once the bars are in place you will need to connect the marker lights to the trailers wiring loom. Under both front corners of the trailer you will see a small electrical plug, this is where you plug them in.

Again, remember to perform a thorough check of all nuts, bolts, wheels, bearings and lights after the first 60 miles. Vibrations can cause slackening of nuts and bolts in new trailers, so it is very important you perform this check.

For a large selection of Erde trailers and accessories please visit our main website – towingandtrailers.co.uk

Back to Top |
Comments Off on Erde 234×4 trailer assembly instructions
Assembly instructions for an Erde PM310 motorcycle trailer kit
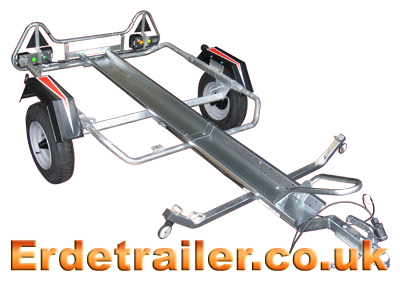
We find that some people have problems following the instructions Erde supply with their trailers. To make this easier we have put together our own illustrated instructions for assembling Erde trailers.
Tools needed:
10mm spanner/socket.
13mm spanner/socket.
17mm spanner/socket.
Flat-head screwdriver.
Socket extension.
Things to remember:
Do not tighten bolts until they are all correctly fitted.
Click on a number to quickly jump to a step.
1. Start by fixing the axle to the frame of the trailer.
2. Attach the drawbar to the axle.
3. Attach the drawbar to the frame.
4. Mount the wheels on the axle.
5. Turn the trailer the correct way up.
6. Attach the crossbar.
7. Bolt the mudguards to the frame.
8. Assemble the motorcycle rail.
9. Fit the rear light bar.
10. Prepare the spare wheel holder.
11. Tighten all Bolts.
Please note: Due to vibration bolts can rattle loose, all bolts MUST be checked after 60 miles.
It is also recommended to check lights, couplings, wheels, and wheel bearings BEFORE every long journey.
1. Start by fixing the axle to the frame of the trailer.
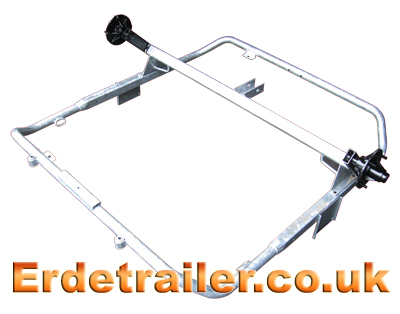
There are pre-drilled holes on each side of the floor pan where the axle mounts. Remember to use washers and nylock nuts before tightening all four bolts with a 17mm spanner and socket. The two round brackets with rubber bushes are used to attach the light bar and should face the rear of the trailer.
2. Attach the drawbar to the axle.
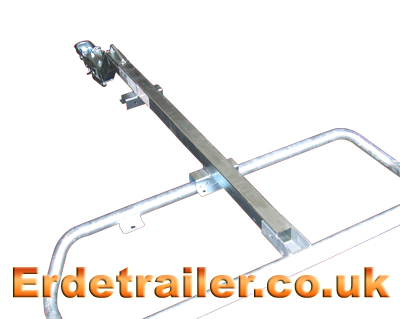
Thread the two coloured wires through the drawbar before slotting it into the centre support of the axle. The large bolt from the end of the drawbar passes through both the drawbar and axle, and is secured with a washer and nylock nut. You will need a 17mm spanner and socket to tighten this.
3. Attach the drawbar to the frame.
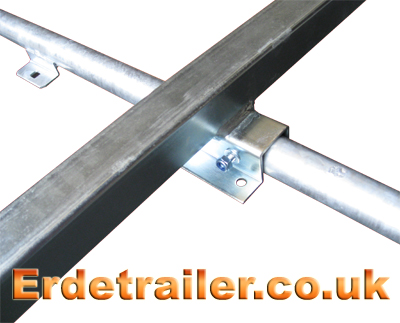
After you have bolted the drawbar to the axle, you will notice that one of the two brackets fixed to the drawbar will slot over the frame of the trailer. Secure this bracket with two bolts, washers and nylock nuts.
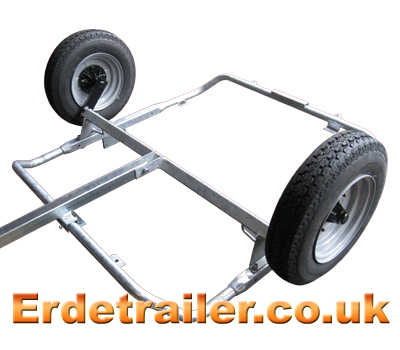
4. Mount the wheels.
Remember that the rounded ends of the wheel nuts must face into the recesses in the rims. You will not be able to tighten the wheel nuts properly if they are fitted facing outwards.
5. Turn the trailer over so it stands the correct way up.
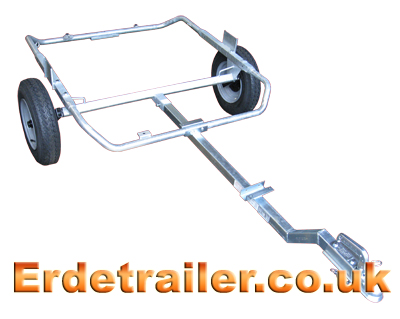
This may take two people to safely lift it.
6. Attach the crossbar.
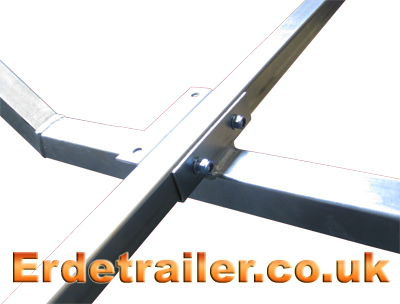
On the drawbar, at the end closest to the coupling, you should see another bracket similar to the one that you bolted to the frame. Slot the crossbar into this bracket and bolt it in place. The lashing rings should be facing upwards, while the reflectors should hang underneath the crossbar facing forwards.
7. Bolt the mudguards to the frame.
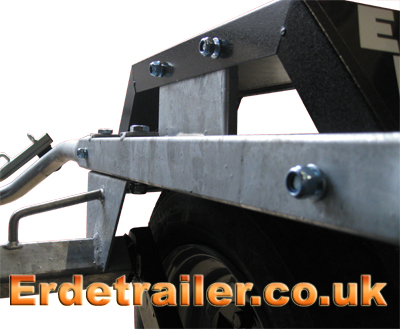
Four bolts with nylock nuts secure each mudguard to the frame. It is important to use washers again here, this will prevent the bolt heads from pulling through the holes in the mudguards.
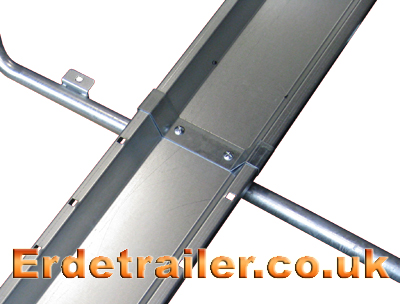
8. Assemble the motorcycle rail.
The motorcycle rail is made up of three separate pieces. When assembling, it is easiest to start at the rear of the trailer and work your way forward.
The rear section of the rail can be identified easily by the two latches on either side. These latches are used to hold the trailer’s tailgate shut, and therefore must face the rear of the trailer. Position this section of the rail on the trailer and secure it in place with a single dome headed screw. Do not completely tighten this screw at this time.
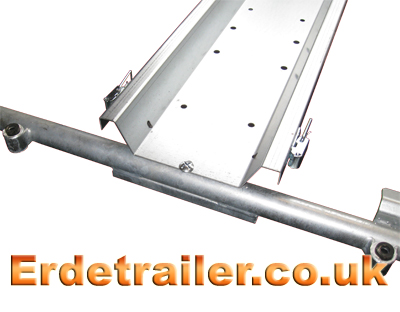
The front section of the motorcycle rail has twelve holes along its sides at one end. This end of the rail must be facing towards the front of the trailer as this is where you attach the wheel hoop. Secure this end of the rail with two bolts and nylock nuts.
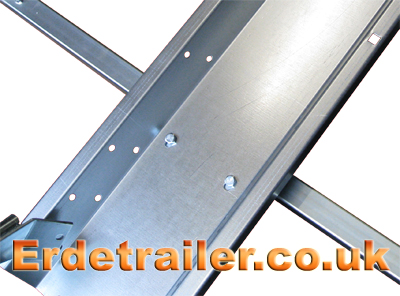
The wheel hoop can be bolted to the rail using any of the pre-drilled holes at the front. Mount it where it best suits the length of your motorcycle.
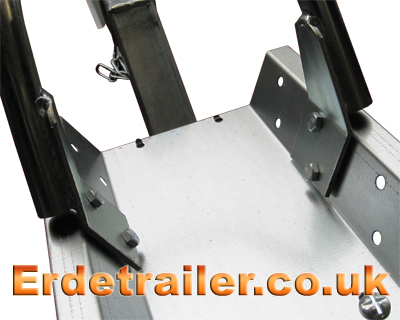
Both sections of the rail are clamped in the middle by a small plate and two more dome headed screws.
9. Fit the rear light bar.
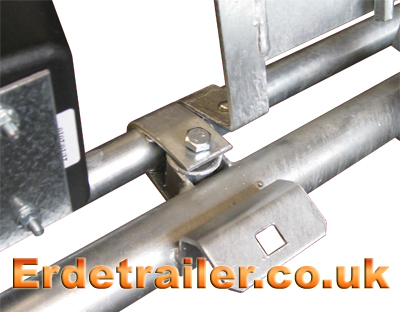
At the rear of the trailer are two small brackets with rubber bushes, this where the light bar fixes to the frame. Bolt the light bar to the frame as shown below.
10. Prepare the spare wheel holder.
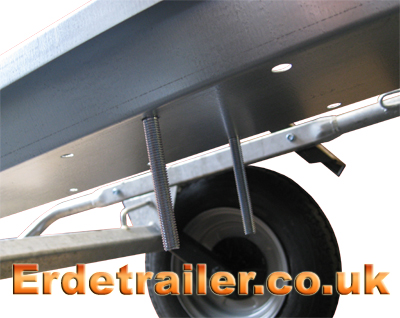
The PM310 comes with a simple spare wheel holder as standard. On the base of the motorcycle rail, just behind the axle are six holes. Any pair of these holes can be used to mount the spare wheel as they are all 115mm apart (the same distance as the PCD of this trailers wheels). Slot the two longest dome head bolts through the rail as shown below, and simply bolt your spare wheel to them.
11. Tighten all bolts.

Now the trailer is complete all of the nuts and bolts will need tightening. Work your way around the trailer tightening every nut and bolt, taking extra care not to miss any.
Again, remember to perform a thorough check of all nuts, bolts, wheels, bearings and lights after the first 60 miles. Vibrations can cause slackening of nuts and bolts in new trailers, so it is very important you perform this check.
For a large selection of Erde trailers and accessories please visit our main website:

Back to Top |
Comments Off on Erde PM310 Motorcycle Trailer Assembly Instructions
Assembly instructions for an Erde 102 trailer kit
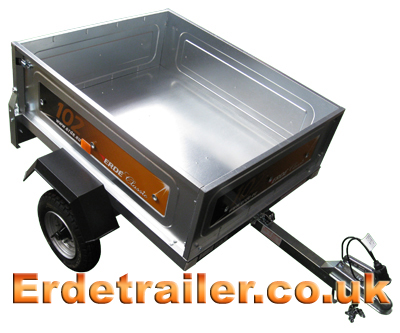
We find that some people have problems following the instructions Erde supply with their trailers. To make this easier we have put together our own illustrated instructions for assembling Erde trailers.
Tools needed:
10mm spanner/socket.
13mm spanner/socket.
17mm spanner/socket.
Flat-head screwdriver.
Socket extension.
Things to remember:
Do not tighten bolts until they are all correctly fitted.
Most nuts are captive nuts to speed up assembly.
Click on a number to quickly jump to a step.
1. Start with the floor pan upside down and fit the axle to the floor pan.
2. Fit the drawbar to the axle.
3. Attach the drawbar to the floor pan.
4. Fasten the light bar to the floor pan using the single bolt in the middle.
5. Attach the cables to the lights.
6. Fit the wheels.
7. Tighten all bolts under the trailer except the centre bolt on the light panel.
8. Turn the trailer the correct way up.
9. Fit the side panels.
10. Fit the front panel.
11. Fit the tailgate.
12. Fit the mudguards.
13. Tighten all Bolts.
Please note: Due to vibration bolts can rattle loose, all bolts MUST be checked after 60 miles.
It is also recommended to check lights, couplings, wheels, and wheel bearings BEFORE every long journey.
1. Start with the floor pan upside down and attach the axle to it using bolts and spring washers.
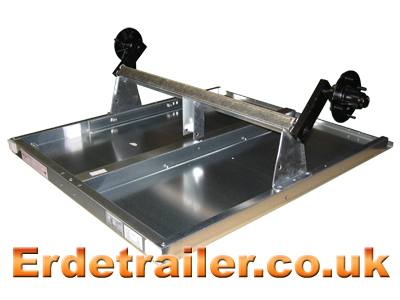
There are pre-drilled holes with captive nuts on each side of the floor pan to make this easier. Use a 17mm socket to tighten these four bolts.
2. Remove the bolt from the rear end of the drawbar, then use it to attach the drawbar to the centre support of the axle.
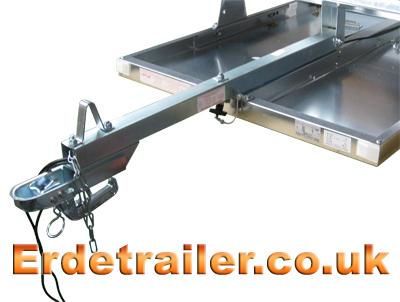
Thread the two coloured wires through the drawbar before slotting it into the centre support of the axle. The large bolt from the end of the drawbar passes through both the drawbar and axle, and is secured with a washer and nylock nut. You will need a 17mm spanner and socket to tighten this. Remember this is the pivot point for the trailers tipping feature, so don’t over tighten it.
3. Attach the drawbar to the floor pan using the tipping bracket.
The tipping bracket must be fitted to the underside of the floor pan as shown below. At the centre point of the front edge are pre-drilled holes with captive nuts where it mounts. A 13mm socket or spanner is required for this.
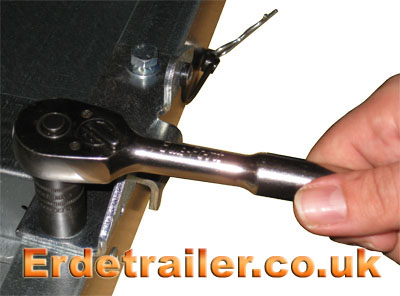
A latch on the drawbar holds the floor pan and drawbar together using the tipping bracket.
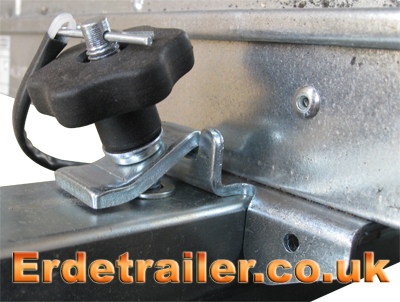
4. Fasten the rear light bar to the floor pan.
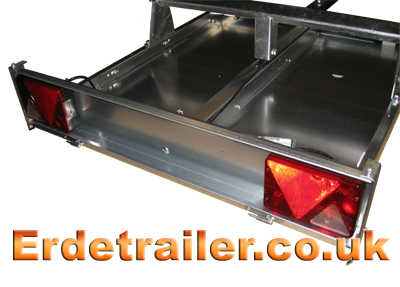
It helps to angle the light bar away from the trailer to make it easier to hook under the lip of the floor pan. Straighten it up when you get it into the correct position.
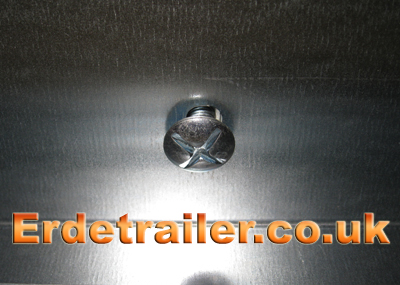
When in position, a single dome head screw though the centre of the light bar will hold it in place.
5. Attach the colour coded cables to the corresponding sockets on the reverse of the rear light bar. Each socket is marked with a coloured sticker.
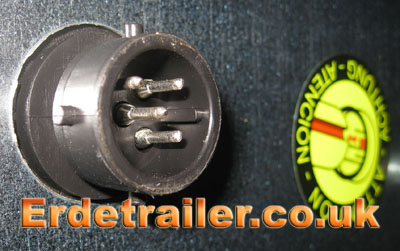
Slot the cables into the sockets and then twist the coloured sheath clockwise to lock it in place. The cable will only slot into the socket in one direction, so don’t force it.
6. Fit the wheels.
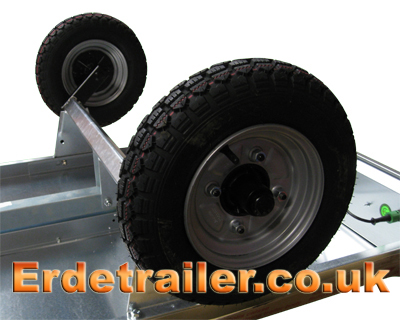
Remember that the rounded ends of the wheel nuts face inwards. If they are fitted facing outwards you will not be able to tighten them up correctly. A 17mm socket or wheel wrench will be required.
7. Tighten all bolts under the trailer except the centre bolt on light panel.
8. Turn the trailer the correct way up. This may require two people.
9. Fit the side panels. It is easiest to mount them at the back first and then lower the front into position.
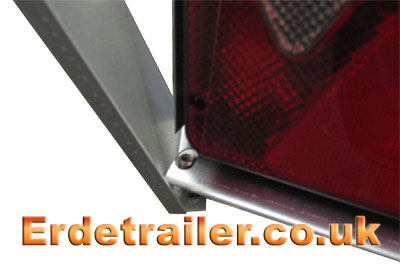
Hook the rear of the side panel over the edge of the light bar before lowering the front of the panel.
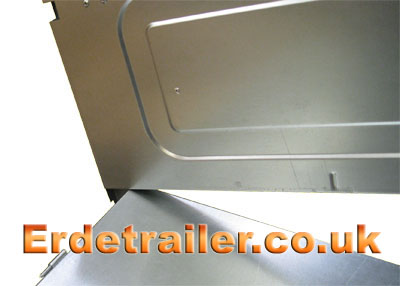
Lower the front of the side panels into position. Where you hooked the side panels over the light bar you will notice a small hole, a 10mm bolt passes through this hole and screws into the light bar.
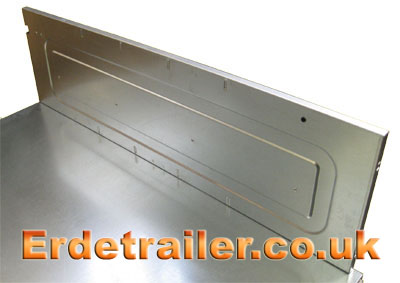
One 13mm bolt at the front and two at the rear of each side panel will hold them in place. The two 13mm bolts at the rear of each panel also secure the light bar.
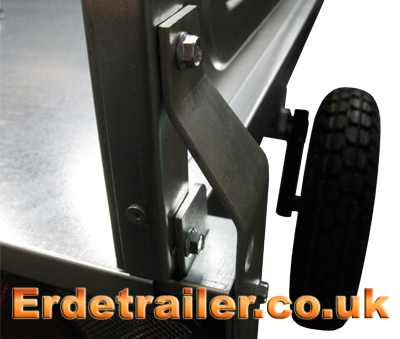
10. Slot the front panel into place, do not completely tighten the bolts at this stage.
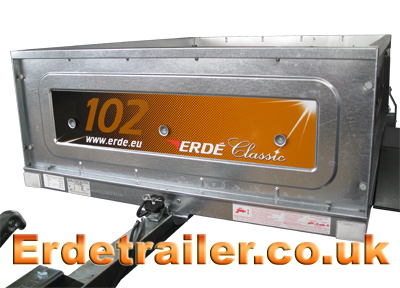
11. Fit the tailgate.
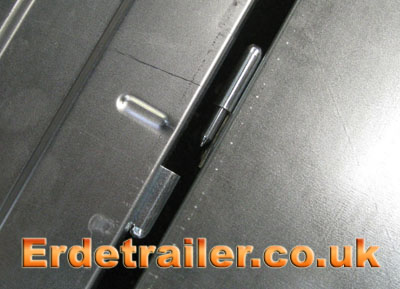
The tailgate hinge simply slides together.
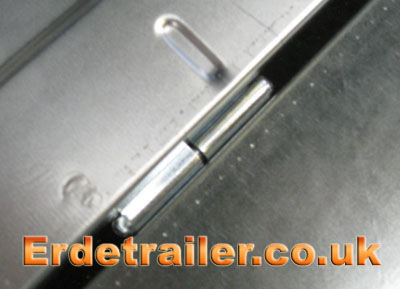
12. Fit the mudguards.
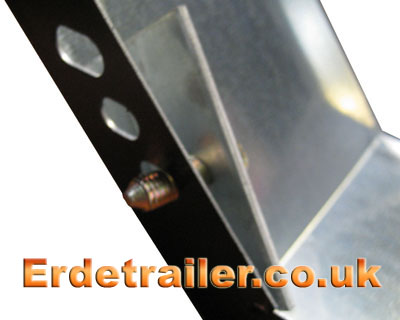
Remember to fit the mudguard reinforcement plates. These prevent bolt heads from pulling through the thin metal of the mudguards.
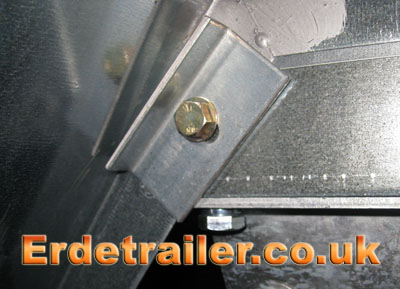
The mudguards mount onto pre-drilled holes in the side of the floor pan, located just above the wheels. A 13mm socket with extension is needed to reach these bolts.
13. Tighten all Bolts.
Again, remember to perform a thorough check of all nuts, bolts, wheels, bearings and lights after the first 60 miles. Vibrations can cause slackening of nuts and bolts in new trailers, so it is very important you perform this check.
For a large selection of Erde trailers and accessories please visit our main website:

Back to Top |
Comments Off on Assembly instructions for an Erde 102 trailer
Assembly instructions for Erde 153, 163 or 193 trailer kits
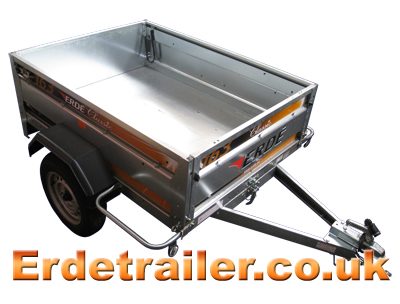
We find that some people have problems following the instructions Erde supply with their trailers. To make this easier we have put together our own illustrated instructions for assembling Erde trailers.
Tools needed:
10mm spanner/socket.
13mm spanner/socket.
17mm spanner/socket.
Flat-head screwdriver.
Socket extension.
Things to remember:
With the exception of a few minor differences the Erde 153, 163 and 193 are assembled in the same way.
Do not fully tighten any bolts until all side panels and mudguards are correctly fitted. This is because you may need the extra slack in order to correctly position some parts.
Most nuts are captive nuts to speed up assembly.
Click on a number to quickly jump to a step.
1. Start with the floor pan upside down, fit the side reinforcement bars and axle.
2. Fit the drawbar to the axle.
3. Attach the drawbar to the floor pan using the tipping bracket.
4. Fasten the light bar to the floor pan.
5. Attach the cables to the lights.
6. Fit the wheels.
7. Thumb tighten all bolts under the trailer.
8. Turn the trailer the correct way up.
9. Fit a side panel.
10. Fit the other side panel.
11. Fit the front panel.
12. Fit the tailgate.
13. Fit the mudguards.
14. Tighten all Bolts.
15. Fit front ‘nudge’ bars.
Please note: Due to vibration bolts in new trailers can rattle loose. All bolts MUST be checked after the trailers first 60 miles.
It is also recommended to check lights, couplings, wheels, and wheel bearings BEFORE every long journey.
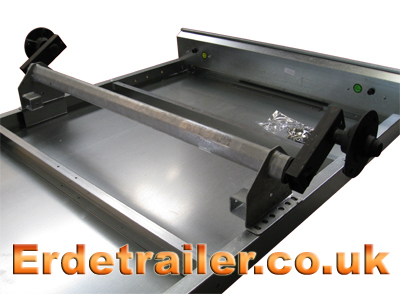
1. Start with the floor pan upside down. Fit the side reinforcement bars and axle.
Before you can mount the axle you must check that the reinforcement bars are in place. These should already be in position, if not, they must be pushed into each side of the floor pan where the captive nuts in the reinforcement bars will line up with the bolt holes in the floor pan.
These captive nuts are used to fix the axle to the floor pan.

Now you can fix the axle to the floor pan. Do not completely tighten the axle bolts at this stage as you will need some extra slack to fit the body panels and mud guards later.
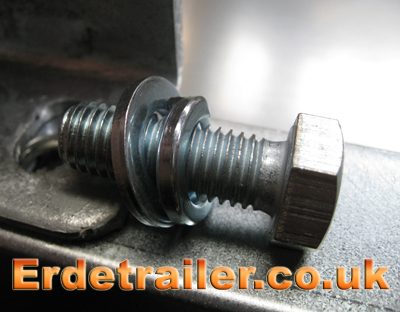
A spring washer should be used on each axle bolt to prevent them from vibrating loose.
2. Fit the drawbar to the axle.
On the drawbar, remove the large bolt that is only thumb tight where the coupling connects to the drawbar. This loose bolt keeps the A-frame drawbar folded together during shipping and will need removing before the drawbar can be opened up.
Remember to thread the two coloured wires through the drawbar, leaving enough slack to reach the light bar.
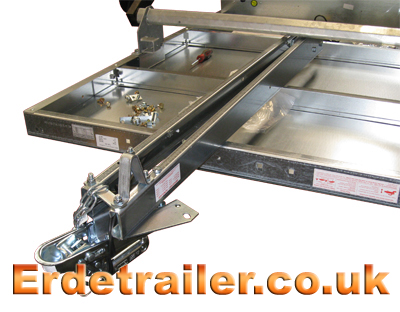
Now you will need to open up the drawbar. Connect one side of the drawbar to the axle before opening it so that you have something to pull against, this should make it easier.
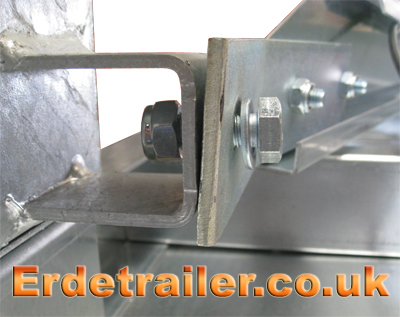
When the A-frame drawbar has been opened up, bolt the end you were pulling on to the axle as well. Remember that the two bolts that connect the drawbar to the axle are the pivot point for the trailers tipping feature, so don’t over tighten them.
Replace the bolt that you removed from the coupling before opening up the drawbar. You will notice that this bolt now passes through both the coupling and drawbar, tighten this up to lock the A-frame in position.
Now you have to fit the A-frame’s reinforcing crossbar. This is a small length of box section with angled edges that fits between the two main sections of the drawbar. This gives the drawbar extra strength, as well as a place to mount a tipping bracket.
3. Attach the drawbar to the floor pan using the tipping bracket.
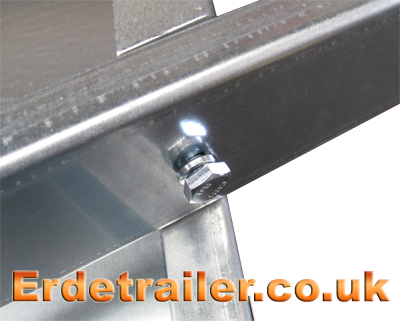
The tipping bracket must be fitted to the floor pan as shown below. There are pre-drilled holes on the front edge of the floor pan where the ‘hook’ part of the bracket mounts. The adjustable latch comes pre-attached to the A-frame crossbar.
Remember that in the image below the floor pan is upside down.

4. Fasten the rear light bar to the floor pan.
The light bar is eventually secured by the body panels, but first you must slot it under this plate. This will hold the light bar in place while you turn the trailer the correct way up to fit the body panels.

5. Attach the cables to the lights.
Attach the colour coded cables to the corresponding sockets on the reverse of the rear light bar. Slot the cables into the sockets and then twist the coloured sheath clockwise to lock it in place. The cable will only slot into the socket in one direction, so line up the pins and don’t force it.

6. Fit the wheels.
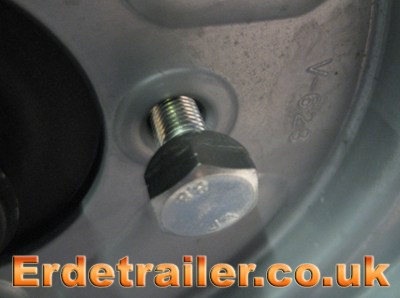
On this model of trailer the wheel nuts are actually stud bolts. To tighten these bolts evenly, work your way around the wheel tightening opposite bolts until you arrive at the first bolt again. This is the most effective way to tighten any wheel stud or nut as it results in even tension around the rim.
7. Thumb tighten all bolts under the trailer.
8. Turn the trailer the correct way up. This will require at least two people.
9. Fit a side panel.
It is best to mount side panels at the back first, and then lower the front into position. The easiest way of doing this is to hook the light bar with rear of the side panel before lowering the front into position.

While the rear of the side panel is ‘hooked’, lower the front of the panel into position.
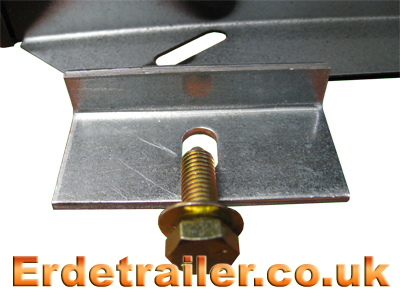
There is a small captive nut on both sides of the light bar, one for each panel. When both side panels are in position a 10mm bolt should be inserted underneath both rear corners and tightened up into the captive nuts on the light bar. It is important to remember these as they are so small they are often forgotten.

10. Fit the other side panel in the same way as before.
11. Fit the front panel.
The front panels on the 153, 163 and 193 are hinged and removable, making the trailer more versatile.
On each side of the front panel you will notice two small lugs. The lugs closest to the top of this panel slot into a cut-out in the front edge of both side panels. This forms a basic hinge. See the example below.

The lugs at the bottom of this panel slot into latches also at the front of each side panel. These latches can be quite stiff, so line the lugs up with the latches before firmly swinging the panel into place. These latches are then secured with lynch pins.

12. Fit the tailgate.
Before the tailgate can be fitted you must attach hinges to the rear of you trailer. The hinges fasten to the trailer with a single bolt while small locating studs hold them in the correct position. Locating studs are useful when you begin to tighten the bolts securing the hinges because the hinge would naturally want to rotate with the bolt when under pressure.

13. Fit the mudguards.
Remember to fit the mudguard reinforcement plates. These prevent bolt heads from pulling through the thin metal of the mudguards.
The mudguards mount onto pre-drilled holes in the side of the floor pan, located just above the wheels. A 13mm socket and extension is needed to reach these bolts.

On this model of trailer there is an extra bolt securing the mudguard to the trailer. It passes through the side panel from the inside of the trailer and tightens into a captive nut on the inside of the mud guard.
If you are having trouble with nuts and bolts not lining up, try using a screwdriver in the bolt hole to lever the panels into position. This is why most bolts should be left thumb tight until this stage.

14. Tighten all Bolts.
Start with the body panels and mud guards before moving on to the axle, drawbar and tipping bracket. Make sure all bolts are tight and these parts are secure.
To reach the axle, tipping bracket and drawbar bolts, you may find it easier to stand the trailer on end. Don’t worry about breaking the rear lights, they are recessed so the trailer can be stored this way. Lifting the trailer into this position will require two people.
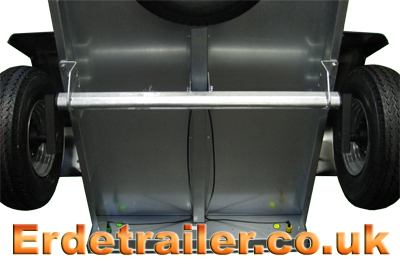
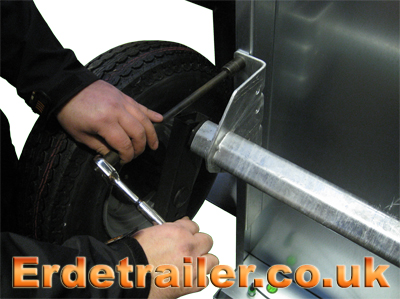
Tighten the axle bolts with a 17mm socket. You may also need a socket extension to reach past the wheels.
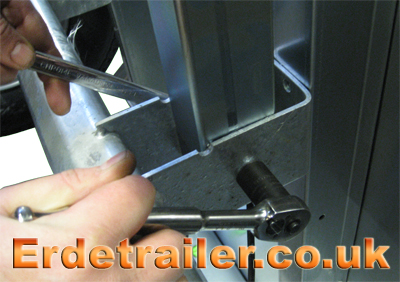
Tighten the drawbar bolt. This requires a 17mm socket and ring spanner.
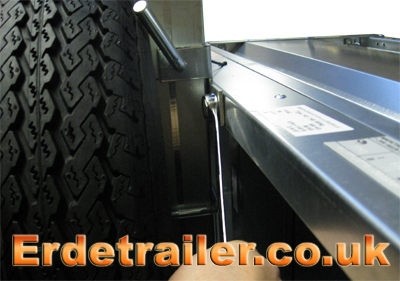
Make sure the tipping bracket is secure. If you have fitted a spare wheel holder you may not be able to use a ratchet in this small space. A 17mm ring spanner will work fine.
15. Fit the front ‘nudge’ bars.
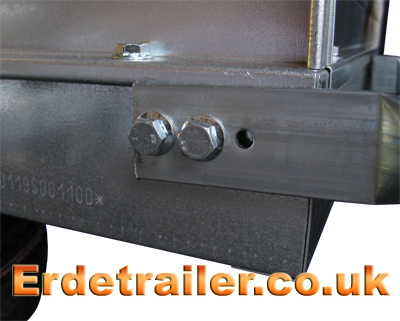
Three bolts hold each of these bars in place. One on the side…
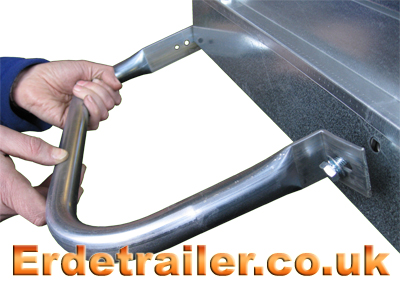
…and two on the front.
Again, remember to perform a thorough check of all nuts, bolts, wheels, bearings and lights after the first 60 miles. Vibrations can cause slackening of nuts and bolts in new trailers, so it is very important you perform this check.

For a large selection of Erde trailers and accessories please visit our main website – towingandtrailers.co.uk

Back to Top |
Comments Off on Assembly instructions for Erde 153, 163 and 193 trailers
Here is a guide to fitting a hard-top cover to an Erde 143 trailer.
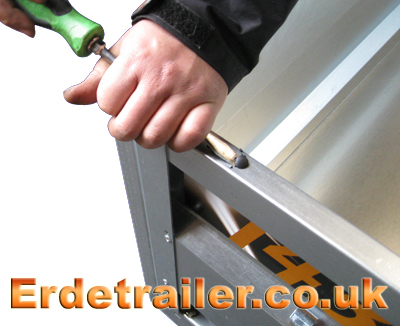
There are pre drilled holes at each side of the top edge of the rear panel, they may be covered by plastic studs that will need to be removed. Remove all plastic studs even though you will only be using the outer most holes.
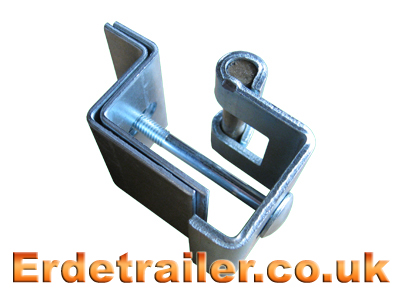
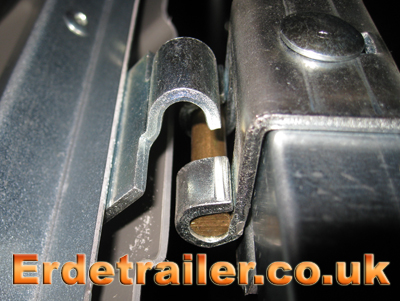
The hinge assembly requires two reinforcement brackets and one half of the hinge. It should look like this:
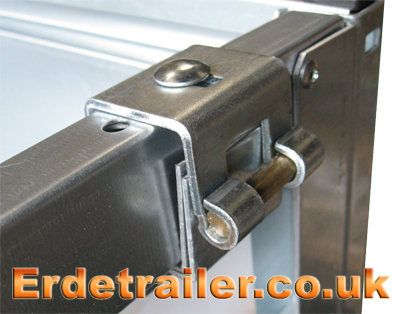
The two reinforcement brackets are fitted under the lip of the rear panel, while the hinge is placed on top. Use the large dome headed bolt to secure the entire assembly to the trailer. When tightening this bolt you will notice that the hinge assembly pulls together and will look neater than it does in this photo. Repeat for the second hinge.
Next, fit two latches to the rear corner posts of the trailer to keep the hard-top securely closed. These are fitted to the outer edges of the rear corner posts using two screws each.
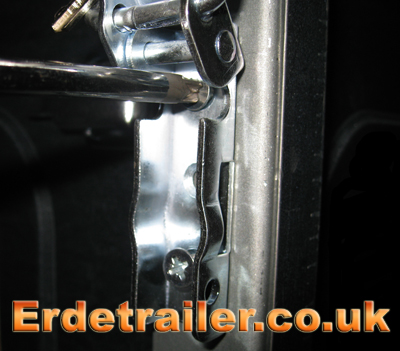
Erde’s hard-top covers have a gas ram or damper to keep the cover open while the trailer is being loaded. This mounts onto a large bolt through either one of the trailers side panels. Just remove the plastic stud from the body panel and insert the bolt on the side you wish to mount it.
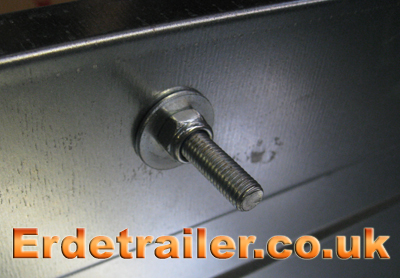
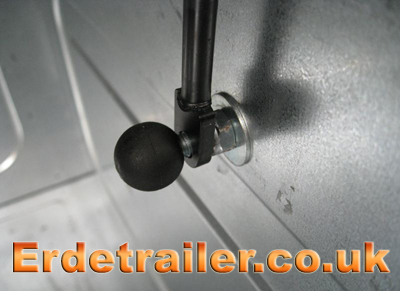
The other end of the gas ram fixes to the hard-top cover. To correctly attach it to the cover you must prepare a bolt as show below:
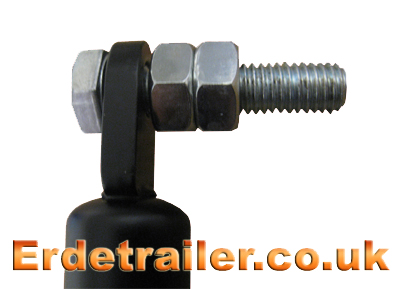
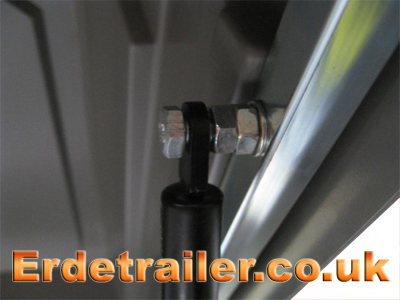
On the inside of the cover you will see threaded holes on both sides of the frame, this is because the gas ram can be mounted on either side. Bolt the gas ram to the cover on the same side that you fitted the bolt through the body panel.
Now you are ready to mount the cover on its hinges. To do this, pick the cover up upside down and keep it horizontal while you hook the hinges together. This requires two people as you can easily bend or damage the hinges attempting this alone.
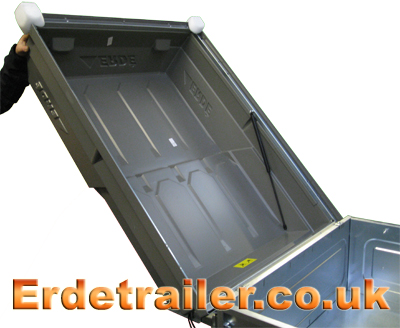
When the hinges are hooked together the cover must be lifted all the way over vertical, then lowered into its normal position. Be careful not to bend the hinges while doing this as it can cause the hard cover to fit poorly.
Finally, connect the gas ram to the bolt you prepared earlier on the inside of the trailer. A plastic thumb nut is supplied for this to make it easy to fit or remove.
After fitting the gas ram, check that the hardtop is fitted correctly and can open and close without problems. Use the latches that have been fitted to the rear corner posts to securely clamp the cover shut.
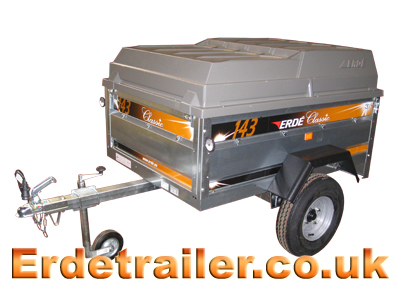
For a wide selection of Erde accessories, including hard-top covers please visit our website:

Back to Top |
Comments Off on Erde 143 hard top fitting instructions

The Erde 194 is the largest and most robust trailer in Erde’s ‘leisure’ range. It is a similar size and can be equipped with the same accessories as the Erde 193 commercial trailer. It has the following features as standard:
- Zinc plated panels and floor (light galvanize)
- Drop down rear tailgate
- Full track galvanized axle beam axle
- Roping buttons allowing covers to be fitted
- TUV approved making it suitable for use in Europe
- 13″ wheels
- 590kg payload
Erde trailers are designed to be adaptable with a wide range of accessories. This model of trailer can be fitted with the following accessories:
Pro’s and Con’s. Starting with the good points:
- Good towing characteristics
- Zinc plated to slow down corrosion
- Recessed tail lights so it can be stored vertically
- Easy to assemble
- Large range of accessories available to improve the versatility of the trailer
Now the bad points:
- Expensive parts and accessories
- Straight drawbar (uncommon for a trailer this size)
For the specification of an Erde 194 please Click here
To buy an Erde 194 please Click here.
To buy Accessories for an Erde 194 please Click here.
To buy parts for an Erde 194 please Click here.
Back to Top |
Comments Off on Erde 194 Trailer Overview

The Erde 143 trailer is quite similar to the Erde 142, with the added bonus of stronger body panels and a larger range of accessories. It has the following features as standard:
- Zinc plated panels and floor (light galvanize)
- Drop down rear tailgate
- Full track galvanized axle beam axle
- Roping buttons allowing covers to be fitted
- TUV approved making it suitable for use in Europe
- 10″ wheels
- 505kg payload
Erde trailers are designed to be adaptable with a wide range of accessories. This model of trailer can be fitted with the following accessories:
Pro’s and Con’s. Starting with the good points:
- Good towing characteristics
- Zinc plated to slow down corrosion
- Recessed tail lights so it can be stored vertically
- Easy to assemble
- Large range of accessories available to improve the versatility of the trailer
Now the bad points:
- Expensive parts and accessories
- Straight drawbar (this is the same for all trailers this size)
For the specification of an Erde 143 please Click here
To buy an Erde 143 please Click here.
To buy Accessories for an Erde 143 please Click here.
Back to Top |
Comments Off on Erde 143 trailer overview
Here is a guide that will help you fit cycle carriers to an Erde trailer.
Please remember that you must have loadbars or a hard-top cover with loadbars installed on your trailer in order to fit cycle carriers. It is also possible to fit these to some car roof racks.
Start by slotting these square headed bolts into the grooves underneath the cycle carriers.
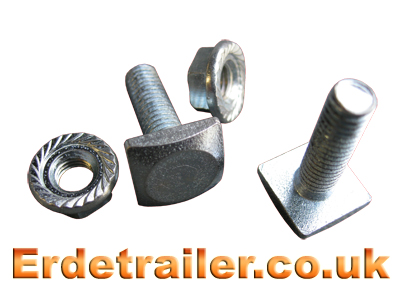
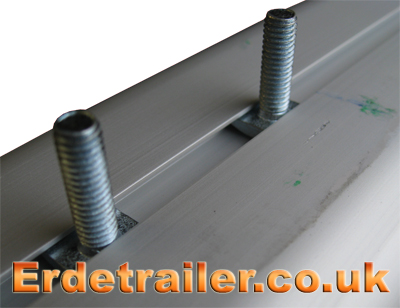
Slot two bolts into each end of the cycle carrier and roughly position each pair the same distance apart as the loadbars on your trailer.
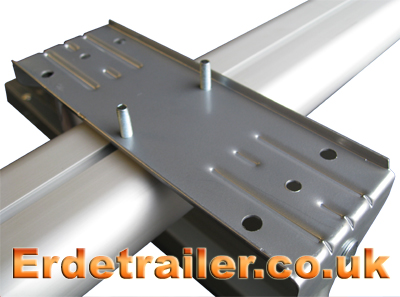
Connect a mounting plate to one end of the cycle carrier using the bolts you slotted into it.
Turn the carrier and mounting plate the correct way up and place it onto the loadbar. Using this U-bolt, connect the carrier to the loadbars via the mounting plate.
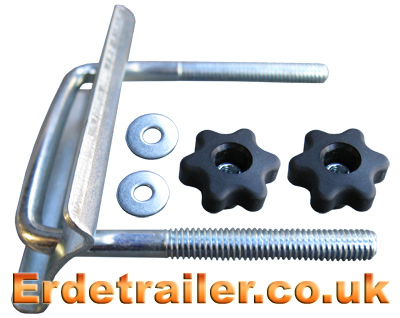
The example below shows how the U-bolt secures the mounting plate to the loadbar.
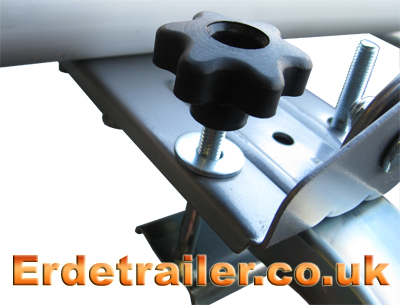
The rear of the cycle carrier connects to the loadbars using the two bolts you have already slotted into the opposite end of the carrier. Make sure these two bolts are positioned either side of the rear loadbar. Using the smallest metal plate (similar to the ones used with the U-bolts) and plastic thumb nuts, simply clamp the rear of the carrier to the rear loadbar.
You will need to slip the small protective pads over the ends of the carrier the where it clamps to the frame of your bicycle. There are two large plastic hand wheels that are used to clamp the cycles frame into the carrier, they must also be fitted at this stage.
Two large bolts are passed through the carrier’s clamp for the hand wheels screw onto. A spring is threaded onto one of these bolts, between the two halves of the frame clamp. This holds the clamp open, ready to accept a bicycle frame.
Finally, insert the black plastic end caps into each end of the carrier.
The example below has been equipped with two cycle carriers. You can attach multiple cycle carriers as long as you have the space on your loadbars.

To avoid overloading your trailer we recommend fitting a maximum of 4 cycle carriers to an Erde 122, 5 cycle carriers to a 142 or 143, and a maximum of 6 cycle carriers to Erde 163 trailers and above.
*Important* There is a known issue when fitting cycle carriers to loadbars mounted on Erde’s hard-top covers. The problem arises on the CP150 model trailer cover (Erde 142 trailers and above). For a detailed description and a suggested solution, please see these related articles: Erde cycle carriers, Trailer load bar fitting guide.
To purchase Erde accessories, including loadbars and cycle carriers, please visit our website – towingandtrailers.co.uk

Back to Top |
Comments Off on Erde cycle carrier fitting guide


